AGRICULTURAET:
asic education
b
Depa
oo ~S
es)
Skip to contentStudy guide
Agriculuture Technology Grade 11 English
Grade 11 Agricultural Technology study guide (English), 110 pages. Read online or get the free PDF download.
Publisher: Self Study
Agricultural Technology · Grade 11 · English. Study guide, 110 pages. Read online or download the PDF.
- Subject
- Agricultural Technology
- Grade
- Grade 11
- Language
- English
- Document type
- Study guide
- Publisher
- Self Study
- Curriculum
- CAPS
- Pages
- 110
- File size
- 10.3 MB
Loading document…
Loading document…
1 of 110
Document textSearch extracted text and jump to a page.
AGRICULTURAL
TECHNOLOGY
GRADE 11
Agricultural Technology Grade 11 1
GRADE 11
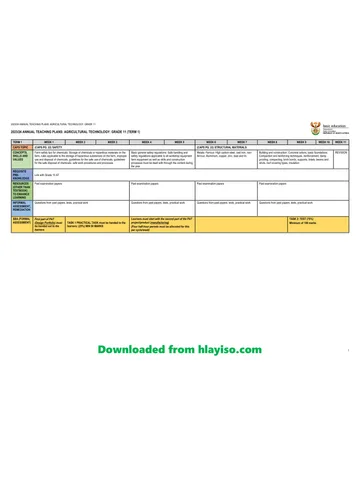
TERM 1
Week Topic Content
4 hours
1 PAT Design portfolio First part of PAT must be handed out to the learners in week ONE. Learners are given THREE
weeks to complete the design portfolio.
1 Research task The research task must be handed out in the first week of the term and learners must hand it in at
the end of the first term.
2-3 Safety Farm safety tips for chemicals:
• storage of chemicals or hazardous materials on the farm
• rules applicable to the storage of hazardous substances on the farm
• improper use and disposal of chemicals
• guidelines for the safe use of chemicals
• guidelines for the safe disposal of chemicals
• safe work procedures and processes
4 PAT Learners must start with the manufacturing of the PAT project/product.
Manufacturing process (Four half hour periods must be allocated for this per cycle/week or afternoons.)
4-5 Safety Basic General Safety Regulations:
• Safe handling and safety regulations applicable to all workshop equipment, farm equipment
as well as skills and construction processes must be dealt with through the content during
the year.
6-7 Structural materials Metals:
• ferrous: carbon steel, cast iron
• non-ferrous: aluminium, copper, zinc, brass, lead and tin
8-10 Structural materials Building and construction:
• concrete rations
• basic foundations: compaction and reinforcing techniques
• reinforcement
• damp proofing
• compacting
• brick bonds
• supports, lintels, beams and struts
• roof covering types
• insulation
Test 1 Learners must write a formal test at the end of this term not shorter than 100 marks with a time
allocation of 2 hours.
Formal Assessment term 1: Research Task: Term 1: One of the following:
Test 1 75% • Safety in the workplace
Research task 25% • Control of chemical or hazardous materials on a farm
PAT (Design) 25% of PAT • The calibration of a specialized tool or equipment
(The Pat marks must be used at the end • Types of planters
of the year for the final PAT mark.)
2 Agricultural Technology Grade 11
TERM 2
Week Topic Content
4 hours
1 Practical task 1 The teacher must do ONE practical task with the learners during this term.
1-2 Energy Electrical Energy: 220 and 380 Volts AC and DC current
• Heating
• Magnetism
Components in the household distribution board:
• earthing
• earth leakage protector
• overload protector
• circuit breakers
Alternating- and direct current systems:
• application and identification
Single and three phase current.
• application and identification
3-4 Energy Electrical conductors, cords, cables and armoured cable:
• Characteristics
• Materials used
• Types
Electric motors, generators and alternators:
• Symbols and units
• Identification. Description.
• Parts
• Function
Multimeter
Three point plug
Geysers
5 Construction Welding:
processes
• arc welding: Working, application, parts, safety, advantages and disadvantages
• oil bath arc welder
• inverter welder
Agricultural Technology Grade 11 3
6-7 Construction • oxy-Acetylene welding:
processes • equipment
• accessories
• working pressure
• welding principles
• welding methods
• assembly of the apparatus
• safety
• welding joints and symbols:
• types of welding joints: Identification and application
• different welding symbol: Identification and function
8 Construction Metal work:
processes
• Temporary and semi-permanent joining methods:
• Riveting
• Bolts
• Nuts
• Washers
• Allen cap bolts
• Pop rivets
• Springs.
• keys
• Thread cutting:
• Taps
• Dies
• Thread cutting nut
• Cutting oils
8-10 Midyear examination Learners must write an exam paper not shorter than 150 marks at the end of this term. Time allocation
must be 2 hours.
Formal Assessment Examples of practical tasks: Teacher can use his/her own examples:
Term 2:
Midyear exam 75% • Distinguish between the different types of water pipes.
Practical Task 1 25% • Cut or clean the thread of damaged bolts or nuts.
• Service an engine.
4 Agricultural Technology Grade 11
TERM 3
Week Topic Content
4 hours
Practical task 2 The teacher must do ONE practical task with the learners during this term.
1 Tools and Safety: associated with electrical hand held equipment according to the OHS Act
equipment
2 Tools and Advanced electrical tools: Parts, function and maintenance
equipment
• chain saw
• angle grinder
• bench grinder
• cut-off machine
• pedestals drilling machine
• guillotine
• electrical hand drill
3 Tools and Equipment: Animal handling facilities: Identification, application, parts and maintenance
equipment
• cattle kraals
• weigh bridge
• dip facilities
• crush pen
• neck clamp
• immobilizer
• dehorning equipment
• hot branding equipment
• syringes
4 Tools and Secondary crop cultivating implements/equipment: Identification, working and application
Equipment • planters
• tillers
• cultivator
• rotivator
• fertilizer applicator equipment
• spraying equipment:
• knapsack spray
• boom spray
TEST 2 Learners must write a formal test during the end of this term not shorter than 100 marks with a time
allocation of 2 hours.
Formal Assessment for Term 3 Examples of practical tasks: Teacher can use his/her own examples:
Test 2 75%
• Distinguish between the different types of water pipes
Practical Task 2 25%
• Cut or clean the thread of damaged bolts or nuts
• Service an engine
.
Agricultural Technology Grade 11 5
TERM 4
Week Topic Content
4 hours
PAT PAT must be finished in this term. Marks must be awarded according to the guidelines provided
for the final product.
1 Irrigation and water Water pumps: Identification, construction, working and application
supply
• electrical submersible
• jet pump
• rotary pump
• centrifugal pump
2 Irrigation and water Water pipes: Identification and application
supply
• PVC
• galvanized
• aluminium
• concrete
• copper
3 Irrigation and water Water sources: Identification and associated laws
supply
• rivers
• wells
• streams
Water storage: Identification and building
• tanks
• dams
• reservoirs
4 Communication Computer and communication technology:
• computer technology in agriculture
• communication technology in agriculture
• agricultural careers
5-6 Drawings Basic freehand sketches of First Angle Orthographic drawings
Interpretation of Third Angle Orthographic Drawings
7 Measurements, Measurements, Calculations and Calibrations: Refer to PAT and simulations
calculations and • measurement and calibration
calibrations
• calculations of fabrication and maintenance expenditure
• production, running and machinery costs
8-10 End of year Learners must write an examination paper of 200 marks with a time allocation of 3 hours.
examinations
Formal Assessment Term 4 Term 4: Promotion mark
Final Exam 50% SBA: Term 1 100
Term 2 100
Term 3 100 Total 300÷12=25
PAT: Design 25
Construction process 50
Final product 25 Total 100÷4=25
EXAM: Total 200÷4=50
Final mark: 100
6 Agricultural Technology Grade 11
CHAPTER 1
SAFETY
1. OHS (Occupational Health and Safety Act). Introduction to the OHS Act. Rules applicable to the safety
on the farm and the safe handling of machines.
2. General farm safety tips.
a. Do not smoke near fuel tanks, gas cylinders or dusty areas where the cigarette can cause a fire or even an
explosion.
b. Do not inhale vapours from the car exhaust. It contains carbon dioxide and is extremely poisonous.
c. No passengers are allowed to ride on a tractor’s mudguard or any other part of the tractor.
d. PTO’s are very dangerous and workers must take care when working with it.
e. Pesticide spraying equipment use hazardous substances and must be used under extreme care and
supervision.
f. When using a tractor to work against a slope one should take care that the tractor does not turn over
because of a too steep obstacle.
g. Care should be taken to prevent a tractor from flipping backwards when heavy objects are pulled.
h. Prevent animals and people from coming into contact with augers, pulleys, belts, cutters and chains when
working with harvesters, hammer mills, cutting machines etc.
i. Avoid working under power lines.
j. Always switch off the machine and wait until it has stopped completely before repairs or maintenance is
carried out.
k. Don’t wear baggy or loose clothing around machinery where it can get caught. Likewise, long hair should
be tied back or kept under a cap.
l. Use safety equipment. Certain tasks may require goggles to protect vision and earplugs to protect hearing.
People who work around noisy equipment are at risk for permanent hearing loss that occurs due to exposure
to loud noise.
m. Never work under raised mobile equipment buckets, parts, or loads. Securely block or support any raised
equipment part when anyone works on or underneath it.
n. Have a qualified person regularly inspect your mobile equipment. If a defect is found, protect anyone in
danger and repair the problem before operating the equipment. Keep an inspection and maintenance log
to track service to equipment
o. Check before starting. Visually inspect your mobile equipment before starting it.
p. Check the surrounding area to make sure no one could be hurt when the equipment is started or moved.
Agricultural Technology Grade 11 7
3. Storage of Chemicals or Hazardous materials on the farm.
3.1 Rules applicable to the storage of hazardous substances on the farm.
a) The pesticides and chemicals that are used on farms can be extremely dangerous.
b) These materials should be kept locked away in marked containers with warning labels.
c) Avoid handling them. In the event that someone is exposed to dangerous chemicals, call your local doctor.
3.2 Improper use and disposal of chemicals. For instance, chemicals:
• can cause illnesses (e.g., respiratory) and injury (e.g., burns)
• can cause cancer in humans and animals
• can get in the human food chain and contaminate water
• can continue to be dangerous for generations
3.3 Guidelines for the Safe Use of Chemicals
• Understand that hazard symbols mean Danger! Do Not Touch
• Read the labels and follow instructions. Do not remove labels.
• Keep chemicals in their original containers with labels intact.
• Use child resistant containers for household chemicals.
• Store hazardous chemicals in secure or locked places.
• Avoid chemical storage problems by buying only as much as needed.
• Use chemicals in well-ventilated spaces.
• Ensure chemical storage area is well ventilated.
• Never mix chemicals together as harmful gas can be produced.
3.4 Guidelines for the Safe Disposal of Chemicals
• No disposal of chemicals in the sink, toilet, trash or yard.
• Adults are responsible for safely disposing of chemical containers.
• Your Rural Municipality will be able to assist you with advice on the safe disposal of hazardous chemicals.
8 Agricultural Technology Grade 11
3.5 Use safe work procedures:
• use personal protective equipment suitable for the job and store the PPE (Personal Protective Equipment)
separate from chemical holding areas
• know how to use the PPE and its limitations
• lock chemical sheds and place them out of areas likely to flood
• store chemicals in containers that cannot be mistaken for something else
• don’t store incompatible chemicals together
• don’t store explosives near detonators
• follow manufacturers’ recommendations and environmental requirements for disposal (e.g., triple rinsing)
• secure hazardous substances during transport
• assign responsibilities to those who order, purchase, receive and transport hazardous substances.
Agricultural Technology Grade 11 9
3.6 An employer shall cause flammable liquid storages to be-:
a. separated by means of fire-resisting material
b. constructed of fire-resisting material
10 Agricultural Technology Grade 11
c. constructed in such a way that, in case of spillage, a volume of the flammable liquid can be contained;
d. ventilated to the open air in such a manner that vapors cannot accumulate inside the store; and
e. clearly marked with a sign
3.7 With respect to any room, cabinet or building, the employer concerned shall cause -
a. discarded cotton waste, cleaning rags or similar material to be removed daily and safely disposed of;
b. only that quantity of flammable liquid needed for work on one day to be taken kept in such room, cabinet or
building;
c. all drums, cans, canisters or similar containers holding flammable liquids to be kept tightly closed when not
in actual use of and, after their contents have been used up, to be removed from the workplace and safely
disposed of daily; and
d. every such room, cabinet or enclosure to be kept clean and all fans, ducts, trunks and enclosures of the
ventilation system to be kept clean and in good working order:
Agricultural Technology Grade 11 11
CHAPTER 2
MATERIALS AND STRUCTURES
1. FERROUS METALS
These are metals which contain iron. They may have small amounts of other metals or other elements added, to give
the required properties.
All ferrous metals are magnetic and give little resistance to corrosion
Ferrous Metals Chooser Chart
Name Composition Properties Uses
Mild Steel 0.15 to 0.30% carbon Tough, high tensile strength, ductile. Girders, Plates, nuts and bolts, general
Because of low carbon content it cannot purpose.
be hardened and tempered. It must be
case hardened.
High Speed Steel Medium carbon, Can be hardened and tempered. Can Cutting tools for lathes.
tungsten, chromium and be brittle. Retains hardness at high
vanadium. temperatures.
Stainless Steel 18% chromium and 8% Corrosion resistant Kitchen draining boards. Pipes, cutlery,
nickel added. aircraft.
Low carbon steel, Very strong and tough. Gears, shafts, engine parts.
High Tensile Steel
nickel, and chromium.
0.70% to 1.40% carbon. The hardest of the carbon steels. Less Chisels, hammers, drills, files, lathe tools,
High Carbon Steel
ductile, tough and malleable. taps and dies.
Medium Carbon 0.30% to 0.70% carbon. Stronger and harder than mild steel. Metal ropes, wire, garden tools, springs.
Steel Less ductile, tough and malleable.
Remelted pig iron with Hard, brittle, strong, cheap, self- Heavy crush machinery. Engine cylinder
small amounts of scrap lubricating. blocks, vices, machine tool parts, brake
Cast Iron
steel. White cast iron, grey cast iron, malleable drums, machine handle and gear wheels.
cast iron.
Name EIGHT properties applicable to metals and describe each shortly.
a) Toughness.
A metal is tough when a high force is needed to break it.
b) Elasticity.
The metal returns to its original form after it has been changed by a load.
c) Malleability.
Allows metal to be spread out in all directions when subjected to pressure, can be hammered and pressed into shape.
d) Ductility.
Metal can be drawn into fine wire and stretched without breaking.
e) Tensile strength
Metal can be drawn out in a thread by means of a die.
f) Brittleness.
12 Agricultural Technology Grade 11
Metal is extremely hard and therefore breaks easily when bended.
g) Hardness.
Metal offers resistance to denting and friction. R scratched or cut
h) Strength.
Metal absorb a large amount of energy without undergoing physical change.
i) Conductivity
Ability to conduct heat or electricity
2. NON-FERROUS METALS
Such metals do not contain any iron. They are not magnetic and are usually more resistant to corrosion than ferrous
metals.
Non-Ferrous Metals Chooser Chart
Name Composition Properties Uses
Aluminium Pure Metal Greyish-White, soft, malleable, conductive to heat and Aircraft, boats, window frames,
electricity, It is corrosion resistant. It can be welded but saucepans, packaging and insulation,
this is difficult. Needs special processes. pistons and cranks.
Copper Pure metal Red, tough, ductile, High electrical conductor, corrosion Electrical wire, cables and conductors,
resistant, Can be worked hot or cold. Needs frequent water and central heating pipes and
annealing. cylinders. Printed circuit boards
Brass 65% copper + Very corrosive, yellow in colour, tarnishes very easily. Castings, ornaments, valves, forgings.
35% zinc. Harder than copper. Good electrical conductor.
Lead Pure metal The heaviest common metal. Soft, malleable, bright Protection against X-Ray machines.
and shiny when new but quickly oxidizes to a dull grey. paints, roof coverings, batteries.
Resistant to corrosion.
Zinc Pure metal A layer of oxide protects it from corrosion, bluish-white, Makes brass. Coating for steel
easily worked. galvanized corrugated iron roofing,
tanks, buckets, rust-proof paints
Tin Pure metal White and soft, corrosion resistant. Tinplate, alloy element for bronze.
Agricultural Technology Grade 11 13
3. BUILDING
CONCRETE RATIONS
1. What is the mixing ratio for cement, sand and stone for:
(As shown on the wrapping of the cement bag)
a) Heavy foundations. (1/2/2)
b) Heavy concrete floors. (1/2.5/2.5)
c) Thin concrete floors. (1/3/3)
d) Concrete poles. (1/1.5/3)
e) Cement bricks. (1/3/0)
FOUNDATIONS
2. What is the size of a normal foundation, as stipulated in the code for building?
600 mm x 230 mm
3. Concrete strip foundations for a building on the farm
Sizes:
INSIDE wall foundation OUTSIDE wall foundation
Width : 450mm Width : 600mm
Thickness: 200mm Thickness: 200mm
REINFORCEMENT
4. Brick-force:
Sizes:
• Brick-force is available in rolls of 20 meter and a diameter of 2,8mm.
• For half brick walls use 75 mm brick force.
• For a full brick wall use 150 mm brick force.
• Brick-force should extend 600mm to either side of each window, but can also be used over the first row or coarse
of bricks of the entire building.
• Use it for the next three courses of bricks to form a strong reinforced lintel, which will be strong enough to carry
the stress load of the roof trusses with roof covering.
• It will also form a lintel to prevent the wall to crack. Join the overlapping sides of the brick force by ± 300mm and
twist the two sides securely.
• Do not cut the corners.
• Rather fold them away to form a 90° angle.
14 Agricultural Technology Grade 11
5. Discuss the reason for the placement of reinforcement in walls?
Built into every 5th layer of bricks and between three layers on top of all window and
door openings. Reason is for preventing cracks and forming of internal tensions.
6. Large structures place extreme stress on their foundations with the result that some foundations tend
to crack because of the weight.
Name any TWO methods of strengthening these foundations and describe each shortly.
a) Strengthening with reinforcement mesh or rods.Reinforcement mesh or rods must be placed in the foundation to
prevent the shifting and cracking of the foundation.
a) Thickness of the foundation The thickness of the foundation plays an important role. The thickness of the
foundation must correlate with the weight of the structure.
7. Reinforcing: (Strip foundations and beams)Make a construction of riffled steel round bar. Five lengths
of 6 meter spaced.
Agricultural Technology Grade 11 15
8. Methods for the use of reinforcing
• Reinforcing of floors (Buildings and big dams).
• Placing of welded round bar mats with and overlap of 300mm lain on the compacted floor lifted with spacing
blocks before the slab is casted.
9. Reinforcing above floor level.
• Use of galvanised steel wire.
• At least 3 lines of galvanised steel wire spaced on the brick wall for the first four courses (rows) and the rest 2 will
be enough to overlap.
DAMP PROOFING
10. Damp proof course (DPC) waterproofing
• DPC can be used under the concrete slab.
• DPC prevents damp from rising up into the walls, causes big problems to paint and plaster at a later stage.
• Before you start the wall, unroll the 225mm DPC onto the brickwork on the foundation; with an overlap of ±300mm.
• Always place DPC underneath all outside windowsills to prevent penetration of water into the wall.
11. COMPACTION
Why must the base of foundations and concrete floors be compacted before the concrete is poured?
• Prevents sagging that causes cracks.
• Weight of walls and roof will tend to compact the soil underneath the foundation.
• Compact the inside of the foundation with a metal tamper if the formation of the ground is sandy.
12. BRICKS
What is a brick?
• Bricks, on the other hand, have to be made from clay before we can build with them.
• If you’ve ever dug wet, clay-rich soil, you know it’s very thick and sticky.
• To turn this gooey material into hard, durable bricks, we have to cut and mould it into rectangular chunks which
are then fired in an industrial oven called a kiln at temperatures of over 1000°C (1800°F).
Bricks are popular as building materials for several reasons.
• First, clay is available throughout the world in large quantities and brick making is a fairly simple process, so bricks
themselves are relatively inexpensive.
• Building bricks are much lighter and easier to work with than stone and sometimes last longer.
• They’re attractive to look at, weatherproof, and—like other ceramics—very well at resisting high temperatures.
• By using different clays, it’s possible to make bricks in different colours.
• Traditional red bricks take their colour from iron in their clay, while yellow bricks have a greater quantity of lime
or chalk.
16 Agricultural Technology Grade 11
Types of brick
Brick selection is among the most important decisions you will make when customizing your home’s appearance. Brick
is, after all, the visual foundation of your home, often making up three-quarters or more of the exterior walls.
Face bricks
The crisp, angular edges of extruded brick are produced as a result of the
manufacturing process in which material is forced through a
die under high pressure, forming a stiff column of material.
Moulded bricks
The soft irregular edges of moulded brick are produced in a manufacturing process
in which material is dropped into a mould
box, vibrated and then released. Molded brick usually have sand finish textures.
Handmade bricks
Authentic Handmade brick is a perfect example of old-world craftsmanship. Each
brick is individually formed and placed in a wooden mould to create a
wonderfully textured brick.
Tumbled
The appeal of this “used brick” look comes from the quaint and charming
irregularity evident not only in the
surface texture, but also in the variation seen when laid up in a wall.
Thin Brick
Thin Brick veneer looks like conventional brick masonry wall,
yet weighs considerably less.
Glazed bricks
Glazed brick meets the highest standards of uniformity, quality and durability, and
is available in a variety of beautiful shades, pure colours and speckled surfaces.
The use of glazed brick is typically reserved for commercial construction.
Agricultural Technology Grade 11 17
Types of bonds
English bond
Stretcher bond:
This method is most commonly used and the simplest.
Header bond
Flemish bond
English bond
English Garden Wall bond
18 Agricultural Technology Grade 11
Flemish variation bond
Scottish bond
Herringbone bond
Basket bond
Agricultural Technology Grade 11 19
13. HOW TO BUILD A BRICK WALL??
20 Agricultural Technology Grade 11
Step One: Set a Concrete Foundation
All walls need a firm foundation. For a single brick width low garden wall, up to around a 450mm high, dig a trench
around 300mm wide and 300mm deep. If the soil is soft or unstable, you may need to dig deeper. Use cement, sand,
stone and water in correct ratio.
Step Two: Dry the Footing
Cover the trench with a length of plastic sheet and allow the concrete to set or ‘cure’ for three to four days until hard.
Step Three: Prepare the Mortar
For small walls, bags of mortar mix are easy to handle and mean the ratio of sand and cement is always right. Lay the piece of
plywood board or metal plate down to protect the ground. Mix the mortar well on the plywood, using a spade to fold the mix together
Agricultural Technology Grade 11 21
Step Four: Lay the First Bricks
Spread an even 10mm layer of mortar along the centre of the foundation. “Butter” the mortar onto the end of the first brick
with the trowel and place it on the foundation with the brick’s hollow side facing upwards. Fix pegs and a string line along
the footings to give you a guide line for the top corner of the first row bricks. Lay this row of bricks, regularly checking
the horizontal spirit level.
Step Five: Arrange the Bricks
The simplest arrangement of bricks for single thickness walls is called a stretcher bond - in this layout, each vertical joint
is staggered and half bricks are used to fill in the end gaps. Use a gauge stick (a piece of batten with the widths of a
brick and mortar line marked up one side) to check that the mortar levels are even as you complete each layer, and the
end of your trowel handle to tap the bricks level.
22 Agricultural Technology Grade 11
14. Art Design
15. Blocks
• Blocks are usually larger than bricks.
• Bricks are usually portable and you can use one hand to lift it.
• However, the block usually requires both hand to lift it and can be laid more quickly than bricks.
• But, the bigger size also means less versatility in laying especially when building up ends or corners also laying
to curves.
• Generally blocks are intended to be plastered.
Types of blocks:
Clay Blocks:
• Clay blocks are generally extruded hollow units.
• The material used in their manufacture is the same as clay bricks.
• After firing, clay blocks are dense, hard and brittle (easy to crack) which make them difficult to cut and fix.
Concrete Blocks:
Agricultural Technology Grade 11 23
• Concrete blocks are also known as concrete masonry units
• Concrete masonry walls correctly designed and constructed will satisfy a variety of building requirements including
fire resistance, durability, aesthetics and acoustics.
The advantages of lightweight blocks are
• Easier to handle and quicker to lay
• The air in lightweight block provide better sound and thermal insulation
• The lighter weight cause in lighter foundations and structural members
• Can be cut and chased with hand tools and hold nails and screws without plugs
Concrete blocks can be manufactured from either natural aggregates or lightweight aggregates
Type of concrete blocks:
• Solid blocks – no formed holes or slots
• Cellular blocks - with cavities (holes) which do not pass through.
• Hollow blocks – with cavities which pass through.
16. TYPES OF WALLS:
Half – brick wall (110mm)
One-brick wall (220mm)
Cavity-wall (270mm 50mm space between the brick walls)
Total of bricks per square meter:
(Length x width x height)
Half-brick wall 51 bricks (m2)
One-brick wall 102 bricks (m2)
Cavity wall 102 bricks (m2)
24 Agricultural Technology Grade 11
17. POPULAR BONDS
• The most popular bond is the stretcher bond.
• The English bond can also be used but is not really in use any more.
18. BEAMS, LINTELS, ARCHES AND COLUMNS:
18.1 Beams / Lintels (Over windows and wall openings)
Brick on edge lintel over the windows must always be reinforced with at least 3 lines of brick-force because it has to carry
the stress load of the roof trusses and the roof covering.
Agricultural Technology Grade 11 25
18.2 What is the function of a lintel?
It acts as support over window and door openings.
18.3 Concrete lintels.
Concrete lintels are well reinforced, very strong and easy to use. In the process of fitting or building the lintel in
position, the lintel must be supported by means of a stay until the walls are dry.
19. A roof construction of wood (SA pine) is erected over a new shed.
Strut
1, 5 m
C
26 Agricultural Technology Grade 11
19.1 What is the function of a roof truss?
Carry stress load of roof
19.2 Name the section of the roof truss labelled as C.
Beam
19.3 The timber (4500 mm x 100 mm x 25 mm) had to be cut into various lengths.
Describe the procedure and tools used to cut a piece of wood 1, 5 m long.
• Measure the length 1,5m with a tape.
• Mark it off with pencil.
• Saw the wood at marked length with hand saw.
• File / sand rough edging
19.4 Various methods can be used to join the different sections of the roof trusses.
What method is used to join these trusses quickly and effectively?
• Use nail plate
• 150 mm (6 inch) nails
19.5 Explain why press wood is not an effective material for roof trusses.
Give a reason for your answer.
• Not a solid wood (not strong enough)
• Deteriorates /rotten in moist circumstances
20. Name the type of insulation material that can be used between the roof and ceiling to keep the shed cool
in summer and warm in winter.
Pink aerolite or any effective insulating material.
21. The farmer needs to construct a flat roof over a shed. The span of the roof is 12 meters. Design and
draw a plain iron roof truss that will be strong enough to carry the weight of the roof.
Label the drawing to identify the parts of the truss. Mention why you will use the type of construction in your design.
Uses triangles, because they are rigid. They strengthen the construction.
22. Name five types of roof covering.
• Grass
• Tiles
• Concrete slabs
• Corrugated iron
• asbestoses
Agricultural Technology Grade 11 27
CHAPTER 3
ENERGY
ALTERNATING CURRENT AND DIRECT CURRENT
1. Name the TWO consequences of the flow of current. Describe each shortly and give one example of the
use of each.
1.1 Heating.
When an electric current flows through a relatively thin conductor the conductor heats up. This is because of the
resistance that the conductor offers. The thinner the conductor the more heat is produced when a current flows through
it. The higher the current the hotter the conductor becomes.
Examples:
• Bread toaster.
• Electric heater for animal production
• Grain drying,
• Water heating
1.2 Magnetism.
When an electric current flows through a conductor a magnetic field develops around the conductor.
Examples:
• Cranes for picking up metal.
• Electric door bells.
• Starters of electric motors.
• Electric motors
COMPONENTS IN DISTRIBUTION BOARDS AND HOUSEHOLD CIRCUITS
EARTHING
2. What does the concept earthing means?
It means that an electrical appliance should be connected in a particular manner to
the general earth mass, because in case of an electric short , an instantaneous
discharge of electric current to the earth takes place.
2.1 Name TWO ways of earthing a house.
• Copper spike (Earth leakage electrode).
• Sheet of copper.
2.2 Name Three quality’s of good earthing.
• Resistance to the earth must be low.
28 Agricultural Technology Grade 11
• Soil must be soft and moist.
• The earth plate must be burr ought deeply
2.3 Why must all appliances be earthed?
• To safeguard the user from electrical shock.
2.4 What will happen if an electrical appliance is not earthed and an electrical shock occurs?
An electric current will flow from the iron through the person’s body to the earth, and
a powerful and sometimes fatal electric shock is obtained.
2.5 In an around the house certain metal objects must always be earthed with an earth
continuity conductor. Name some of these objects.
• Roof, guttering, down pipes.
• Electric conduit in the walls.
• Outlet pipes of baths and basins.
• Electric geyser and electric stove.
2.6 How is earthing done in and around the house.
All wall-plugs sockets are joined by means of the continuity earth conductor. The
portable appliances in turn is connected by means of a three-cone cable and a plug to
the wall-plug socket.
2.7 Which type of electrical appliances is not earthed?
Appliances that are entirely made of plastic or synthetic material that does not
conduct electricity.
2.8 What is the function of the circuit breakers in a distribution board?
Connect individual circuits or appliances to the general electrical supply. Each has a
prescribed amperage setting that protects the circuit or appliance against overloads or
short circuits.
Agricultural Technology Grade 11 29
3. THE IDENTIFICATION OF ALTERNATING CURRENT AND DIRECT CURRENT SYSTEMS
3.1 Describe each of the following shortly.
Alternating current
• Alternating current are so called because the current does not move in one direction like direct current but
alternates in polarity in a given time period.
• mostly applicable to Households, Industries and on farms.
Direct current
Direct current moves in one direction only from positive to negative.
Usually used in electrical systems of vehicles, small appliance circuitry (Radio circuits) and in houses that has alternative
power sources like wind and solar energy systems and uses 12 V, 24V lights and appliances.
Single phase alternating current systems
• Are effectively used in a house for lights and other applications.
• Are applied on appliances, motors etc. that uses 220 V.
• Single phase alternating current motors are more expensive than three phase motors because it is more
complicated with starter mechanisms and capacitors.
Three phase alternating current systems
• Are effectively used in houses for stoves and other applications that are high consumers of electricity.
• Are applied on machines, motors etc. that uses 380V
• Multi phase motors deliver higher energy/power than a single phase motor.
• A Multi phase motor has ‘n higher turning momentum than a single phase motor.
• Multi phase motors uses less electrical power than single phase electrical motor.
3.2 Electric conductors, cables and cords
3.2.1 Good electrical conductors must have the following characteristics.
• Low resistance
• Must be resistant to the elements of nature.
• Heat resistant.
• Readily available
• Cheap
30 Agricultural Technology Grade 11
3.2.2 Types of good conductor material used in electrical cables.
• Copper.
• Aluminium.
3.2.3 Three types of electrical cables.
• Flexible cords
a) Have normally only two cores that are isolated with PVC.
b) Are used for small table lamps that must be connecting to the wall socket.
• Flexible cables
a) Carries more current than a flexible cable and have one, two, three or more cores.
b) Each ore is separately isolated with a common outer PVC coating.
c) Are used with electrical equipment like: Lawn mowers, kettles, vacuum cleaners, TV’s Hi FI’s and all the electrical
hand tools in the workshop.
d) Colour of the cores that are normally found in such a cable is
Brown = Live conductor/wire
Blue = Neutral conductor/wire
Yellow/green striped conductor = Earth conductor/wire
• Armoured cables PVC
This type of cable has an armoured wire covering that protects it from mechanical damage.
It can have more than one cores and with varying thicknesses.
Are used where medium to high voltage current are conducted over short or medium distances.
4. An electrical cable consists of three essential parts.
Agricultural Technology Grade 11 31
4.2.1 Identify the section that conducts the electrical current. (Write only the letter.)
A.
4.2.2 Describe the function of the covering in label B.
• To isolate conductors
4.2.3 The section labelled C is designed for protection. Give an example of what it protects the
cable against.
• Mechanical damage (or digging, wear and tear)
• Chemical damage
5. Study the sketch of a three-phase cable used to provide electricity to electrical appliances. The cable
consist of four separate conductors namely, line 1 (L1), line 2 (L2), line 3 (L3) and the neutral wire. Answer the
questions that follow:
5.1 What colour is the neutral wire?
Black.
5.2 Name the colours of the three live wires L1, L2 and L3
Red, Blue and White.
5.3 What is the purpose of the wires that are wounded around the inner cores of the cable?Protect
inside conductors against mechanical damage.
5.4 The diameter of electrical wires plays a very important role when connecting electrical machines
to the main power supply. Discuss the influence that the thickness of electrical wires has on
power supply.
• The more/lesser the watts needed by a machine the thicker/thinner the wire.
• The longer/shorter the distance between the supply and the machine, the thicker/thinner the wire.
32 Agricultural Technology Grade 11
6. ELECTRICAL MOTORS AND GENERATORS
6.1.1. Describe the difference between an electrical motor and a generator.
An electrical motor convert electrical energy into mechanical energy or turning momentum.
A generator converts mechanical energy into electrical energy.
6.1.2. Name the parts of an electrical motor.
• Rotor
• Shaft
• Fan
• Fan covering
• Terminal/Conduit box
• End bearing
• Stator frame
• Stator wound
Agricultural Technology Grade 11 33
A generator uses mechanical energy. It converts that mechanical energy into electrical energy.
34 Agricultural Technology Grade 11
An Alternator in a vehicle uses the turning momentum of the engine to produce electrical energy; this energy is in turn
used to recharge the battery of the vehicle.
6.1.2. Describe the working of the direct current motor starter.
• Electrical motors cannot be connected directly to the electrical power without initially withdrawing too much
electricity.
• This high electrical withdrawal and unpreventable consequences like overheating of conducting wires, tripping of
overload switches and damage to the motor can be prevented by inserting a electrical starter into the electrical
connection to the motor.
• The starter consist of a adjustable resistor that controls the current and the speed of the motor.
• The motor starts turning when some of the resistance is removed.
• The motor turns at its maximum when all the resistance is removed
Agricultural Technology Grade 11 35
6.1.3 Things to remember before installing an electrical motor.
• Always choose a motor with a little higher force than what is required
• Speed of the motor
• Type of frame. Water tight.
• Type of motor
6.1.4 Things to remember when installing an electrical motor.
• Use the correct grade and thickness conductor for connecting the motor to the
• electricity supply according to regulations.
• Use the correct switch gear for the motor according to specifications.
• Ensure that motor and switchgear are correctly earthed.
• Motor and switchgear must be suited for the available supply voltage.
• All electrical apparatus must be mechanically and electrically protected.
• Test the installation for faults before starting the motor
• Make sure that the motor is running freely before starting it.
• Ensure efficient ventilation and cooling of the motor
6.1.5 Maintenance of electrical motors.
• Keep the motor clean.
• Bearing must be serviced regularly.
• Brushes must be checked regularly for wearing.
• Electrical connections, contact points and safety apparatus must be checked regularly.
36 Agricultural Technology Grade 11
6.1.6 Study the following data taken from a typical tag on an electric motor.
a. Why must all electric motors be fitted with such a tag? (1)
It contains all the information about the electric motor.
b. What is the current used for this motor as indicated on the tag? (1)
16.6 Ampere.
c. How is the starter connected to the motor according to the tag? (1)
Delta.
d. All electric motors manufactured in South Africa must comply with certain standardised
criteria as set by the SABS. Name TWO of these prescribed standards applicable to the
axles of electric motors. (2)
a) Axle heights must be the same for different manufacturers.
b) Axle diameter must be the same for different manufacturers.
7. Compare the difference between the following types of electrical motors as shown in
the table below. Write only the correct answer next to the question number on your
answer book.
Agricultural Technology Grade 11 37
Direct current motor
(DC)
Alternating current motor (AC)
Voltage
Up to 12 Volts.
220 – 380 V.
Type of current
Direct current.
Alternating current
Application
Self-starter
Compressor motor.
8. THE MULTIMETER
Describe the Multimeter as it is used as a measuring instrument in electrical
Installations.
• It is an instrument that can be used to test/measure volts, amperage, resistance and potential difference in
alternating current and direct current circuits.
• Al these measurements can be done just by switching the multi meter to that specific application.
38 Agricultural Technology Grade 11
8. THE THREE POINT PLUG
Draw and label the three point plug.
8.1 THREE PHASE CONNECTING PLUG
The sketch shows a diagram of a three phase plug that is used to connect three phase electrical equipment to
a three phase wall socket.
Agricultural Technology Grade 11 39
9. ELECTRICAL HOT WATER HEATER/GEYSER.
Components of the electrical geyser.
1. External coating Polyester coating provides extreme durability and an attractive finish.
2. Insulation A thick polyurethane layer ensures optimal insulation and heat retention.
3. Storage tank Fabricated with automatically welded thick steel to ensure precision. Permitted working pressure
of 8 bar (800 kPa).
4. Enamel coating An internal glass-enamel coating protects against corrosion.
5. Electric element Energy-efficient electric element with rapid heating time ensures hot water 24 hours a day, 365
days a year.
40 Agricultural Technology Grade 11
6. Anode Provides anti-corrosion protection.
7. Thermostat Ensures a preset temperature is not exceeded when using the electric element.
8. Double heat exchanger* An efficient heat exchanger.
9. Cold water inlet
10. Hot water outlet (to user)
General questions
9.1. What is the function of the Latco valve?
Designed to open when the water pressure in the geyser are too high and steam or hot water are released.
9.2. Name the three energy sources used too heat water.
a) Coal.
b) Electricity.
c) Solar.
9.3. Make a neat-labelled sketch of the electric geyser.
9.4. What is the function of a thermostat?
Keeps the water temperature inside the geyser constant.
Agricultural Technology Grade 11 41
9.5. What is the function of a element?
Heats up the water.
9.6. Describe shortly on what principle does a hot water geyser works.
Works on the principle that hot water rises to the top of a container and cold water stays at the bottom.
9.7. Why must a pressure release valve be installed on a geyser?
This will prevent the geyser from bursting due to a high pressure in the geyser.
9.8. Name TWO possible reasons for a geyser to burst.
• The thermostat gets stuck and does not switch off the electricity to the element.
• The thermostat is set at its maximum temperature and the casing of the geyser is corroded or damaged.
9.9 What is the function of the vacuum release mechanisms on a geyser.
It is installed on both the hot water and cold water pipes just above the geyser to prevent the geyser from emptying
when the water inlet is cut off.
9.10. Name the equipment that must be installed in a house electrical circuit to safeguard a person when he is busy
bathing or turning on the water inside a house from being electrocuted when a short circuit happens and the short
flows through the water piping system of the house.
• Earth leakage protector.
• All metal parts of the geyser must be connected to the general earth
For instance the piping and the geyser itself must be earthed.
9.11. Name the equipment that must be installed in a house electrical circuit to safeguard the geyser when a potential
overload occurs in the electrical circuit of a geyser.
• Overload protector.
10. LIGHTS ON FARMS FOR SPECIFIC PURPOSES.
10.1. Light bulbs
Describe the ordinary light bulb.
• This type of light make use of an element that glows when electricity passes through it.
• The glow element is made of tungsten.
• The glowing wire is protected inside a gas filled glass container.
42 Agricultural Technology Grade 11
• The light bulb is filled with argon or nitrogen that prevents the glowing wire from burning out as what will happen
when the wire comes into contact with oxygen.
• The bulb tends to give off a high amount of heat because of the element that is glowing.
Disadvantages of the bulb light.
• Burst when comes into contact with water because it is very hot.
• Danger of starting a fire in dusty situations.
• Can cause serious burns to people if they touch a warm light bulb.
• Electrical light bulbs has the potential to deliver fatal electrical shock to a person
10.2. Tube lights.
Describe the ordinary tube light
• Gas filled cylindrical tube with electrodes at both sides
• Collusions between the gas ions inside the tube cause increased energy levels that produce light.
Advantages of this type of lights
• Works at low temperatures
• No explosions because of extreme heat
• No fire hazards
• No burning injuries to people or animals
10.3. Fluorescent lights.
Describe the Fluorescent light
• Phosphorous powder and argon gas are used inside the glass tube.
Advantages of fluorescent lights
• High efficiency
• Energy saving
• Low heat emitting
• Viewer light glare
• Ten times longer lifespan.
Disadvantages of fluorescent lights
• Not suitable for low temperatures
• Protective covering are needed in moist conditions
• Lifespan is shortened when switched on and off for many times.
• Higher initial installation cost than ordinary bulbs.
Agricultural Technology Grade 11 43
10.4. Requirements for efficient security lights
• Must provide adequate light at the required intensity and at the required spot to deter intruders.
• The light must be installed in such a position that it shines into the intruders face and not into the farm owner’s
face.
• Light must have low electricity consumption.
• The light unit and its brackets must be durable and strong
• Unit must be placed where it cannot be stolen or damaged easily.
• The light must cover a wide range and must have no dark spots.
• Must be resistant to the elements of nature.
44 Agricultural Technology Grade 11
CHAPTER 4
SKILLS AND CONSTRUCTION PROCESSES
WELDING
OCCUPATIONAL HEALTH AND SAFETY ACT, 1993
1. SAFETY
General Safety Regulations for Welding, cutting, soldering and similar operations
1.1 No employer or user of machinery shall require or permit welding or flame cutting operations to be undertaken,
unless -
a. the person operating the equipment has been fully instructed in the safe operation and use of such
equipment and in the hazards which may arise from its use;
b. effective protection is provided and used for the eyes and respiratory system and, where necessary, for the
face, hands, feet, legs, body and clothing of persons performing such operations, as well as against heat,
incandescent or flying particles or dangerous radiation;
c. leads and electrode holders are effectively insulated; and
d. the workplace is effectively partitioned off where practicable and where not practicable all other persons
exposed to the hazards contemplated in paragraph (b) are warned and provided with suitable protective
equipment.
1.2. No employer or user of machinery shall require or permit welding or name cutting operations to be undertaken in
a confined space, unless --
a. effective ventilation is provided and maintained; or
b. masks or hoods maintaining a supply of safe air for breathing are provided and used by the persons
performing such operations.
1.3. No employer or user of machinery shall require or permit electric welding to be undertaken in wet or damp places,
inside metal vessels or in contact with large masses of metal, unless --
a. the insulation of the electrical leads is in a sound condition;
b. the electrode holder is completely insulated to prevent accidental contact with current-carrying parts;
c. the welder is completely insulated by means of boots, gloves or rubber mats; and
d. at least one other person who has been properly instructed to assist the welder in case of an emergency is
and remains in attendance during operations: Provided that the provisions of this sub-regulation shall not
apply to a welding process where the maximum voltage to earth does not exceed 50 volts.
Agricultural Technology Grade 11 45
1.4. No employer or user of machinery shall require or permit welding, flame cutting, grinding, soldering or similar work
to be undertaken in respect of any tube, tank, drum, vessel or similar object or container where such object or
container --
a. is completely closed, unless a rise in internal pressure cannot render it dangerous; or
b. contains any substance which, under the action of heat, may --
i. ignite or explode; or
ii. react to form dangerous or poisonous substances,
2. FIRE SAFETY
• Molten metal can spit several feet from a weld.
• Grinding sparks are even worse.
• Do a risk assessment on your surroundings - though you could wait until you’ve had a few destructive fires like I
did.
• Any sawdust, paper or plastic bags in the area can smolder and catch fire so keep a tidy area for welding.
• You think you’ll notice flames but flames aren’t bright when looking through a shade 10 visor.
• Keep a fire extinguisher beside the exit door from your workshop. CO2 is the best type for welding.
• A bucket of sand is also a good idea - it could save the expense of having the fire extinguisher refilled.
• The photo shows a foam extinguisher (it contains water so it’s not safe for use near electrical equipment like
...err... electric welders).
• Don’t squirt water or foam extinguishers anywhere near electricity for obvious reasons unless a person who is
competent to pronounce on the safety thereof has, after examination, certified in writing that any such danger has
been removed by opening, ventilating or purging with water or steam, or by any other effective means.
3. Welding safety
This is not a comprehensive guide. There are many ways in which welding can damage your health. The main points
are:
• Protect all skin from UV light
• Closing your eyes for a few sneaky tacks will not prevent arc eye
• Work in a well-ventilated area (extraction fans not blowing fans as those would blow your shielding gas away).
• Wear a vapour mask if your extraction isn’t great.
• Be careful not to have flammable stuff nearby. Welding and grinding sparks can travel a long distance.
46 Agricultural Technology Grade 11
3.1 Welding arc eye
• The light generated by MIG welding is extremely bright.
• Looking directly at a welding arc even for a short time causes arc eye when the bright flash from the arc
burns the cornea.
• The cornea is very sensitive to sun burn.
• Expect to be awake all night with the sensation that someone is sticking pins in your eye.
• For sensible people wearing a full face welding mask it tends to be the reflected light that causes arc eye.
• Welding all day in a room with white painted walls can be enough.
• Welder’s caps aren’t just to stop sparks.
• Be very careful to warn anyone else in the area when you are about to start welding, and use a welding
screen if welding in an area where there might be passersby.
• Be especially careful with pets and children - they can be as daft as a brush.
A basic welding helmet
3.2. Metal vapour and your lungs, kidneys, brain etc.
• MIG welding and angle grinding results in metal vapors.
• Aluminum alloy vapor and fumes from zinc coatings are poisonous.
• Exposure can result in heavy metal poisoning (welding shivers) - flu like symptoms that can persist for a
few days.
• The zinc coating should be removed from galvanized steel before welding, and wear a proper charcoal
welding mask when you go anywhere near zinc.
• It doesn’t stop there - the fumes from flux cored gasless wire and ARC welding is nasty. Stainless gives off
chromium, MIG and TIG arcs give off ozone.
• Welding should be carried out in a well-ventilated area.
• This stuff is cumulative. Professional workshops normally have extraction systems.
• A DIY approach might be to leave the garage door open when welding. For prolonged welding, it’s a good
idea to wear a vapour mask.
Agricultural Technology Grade 11 47
3.3. Protection from UV light and molten metal
• The light from MIG welding has a strong ultraviolet content and causes sunburn. I’ve welded in a T-shirt in
the past and the burns from an afternoon of thick metal were very painful.
• Full covering of arms and legs is essential. If it’s hot wear thin clothes in preference to stripping to exposed
skin.
• Although the weld is also likely to spit small blobs of metal out. Welding gauntlets protect the hands and
wrists, and it is sensible to wear cotton overalls or clothing.
• Take care not to leave gaps in your clothing or shoes where a blob of metal could enter. Blobs of molten
metal can burn through any thin clothing and cause small but painful burns.
• The metal you weld stays hot for a good while.
• Most of my burns have been caused by forgetting this and picking up a hot piece of metal in my bare
hands.,
,
48 Agricultural Technology Grade 11
MIG WELDING NOZZLE
OIL BATH ARC WELDING MACHINE
3.4 The figure beneath shows an machine that are used in the farm workshop. Study it carefully and answer the
questions that follow: ,
3.4.1 Give the name of this type of welding machine.
Oil bath welding machine.
3.4.2 Briefly describe the function and purpose of both cable lugs and couplings indicated in the sketch?
• One lug is the negative connection point and is stationary.
• The other lug is the positive connection point and can be moved to higher or lower amperage settings.
3.4.3 Which substance is used inside this type of welder to cool it down?
Transformer oil.
3.4.4 Identify the material used to insulate the electrode holder and provide TWO crucial properties of this
insulation material.
Bakelite.
Must not conduct electricity.
Heat resistant.
Agricultural Technology Grade 11 49
4. THE INVERTER WELDER
• An inverter welder is a type of welding power supply capable of providing a high current for welding.
• The welder uses a series of rectifiers and solid-state switches to convert 60 Hz alternating current (AC)
input power into direct current (DC) output power.
• The amount of output current and voltage available during the welding process is controlled by computer
software.
• An inverter welder weighs considerably less while at the same time consumes less electricity than a
comparable traditional welding power supply.
4.1. A traditional welding power supply uses a large, iron-core transformer to convert low amperage, high voltage
AC into high amperage, low voltage AC. A rectifier is then used to convert the AC into DC for use in the welding
process. The transformer in this type of power supply typically needs to be quite large to work correctly.
4.2. An inverter welder first uses a rectifier to convert the incoming AC into DC. This current is the switched on and
off very quickly, creating a pulsed, high frequency direct current. Typical frequencies range from 10,000 to 20,000
Hz, although frequencies as high as 100,000 Hz are possible. The high-frequency, low-amperage current is fed
into a transformer where it is changed into high amperage DC, before being rectified again.
It is possible to use an inverter welder to power all welding processes including Stick, Metal Inert Gas (MIG) and
Tungsten Inert Gas (TIG).
4.3. APPLICATION:
• The reduced size and weight of inverter welders make them popular choices for applications where a
traditional welding power supply would be too bulky or consume too much power.
• They are commonly used in machinery maintenance facilities and automobile repair shops.
• Many welding and fabrication shops are replacing their traditional welding power supplies due to the
potential cost and space savings afforded by inverter welders.
• Farmers, as well, are increasingly turning to portable, lightweight units to make on-site repairs.
4.4. ADVANTAGES:
Small size, light weight, saving manufacturing materials, portable and easy to move the basic characteristics
of inverter welder is high operating frequency, so it brings many advantages. As the frequency of inverter welding
machine is much higher than the operating frequency, so the transformer size and weight will be greatly reduced.
Similarly, substantial increase in operating frequency, the reactor’s size and weight will be drastically reduced.
Flexible control
Inverter welder apply electric drive semiconductor power devices, it can precise control of the size of the current in the
microsecond range. Control to improve the accuracy significantly improved precision welding and cutting, meet the needs of a
variety of welding methods. The welding current of traditional welding machine adjust only by manual adjustment transformer.
Energy saving and high efficiency
The transformers and reactors of inverter welding machine greatly reduces the size and weight, the corresponding
power loss (mainly magnetic core loss and conductors energy consumption) also will be greatly reduced, the effective
power output up to 82% ~ 93% . The traditional welding machine effective power output only 40% to 60%, it is serious
waste of power resources.
50 Agricultural Technology Grade 11
Output voltage and current stability
Inverter welder has anti-interference, less susceptible to voltage fluctuations and temperature changes. Traditional
welding machine apply AC power, because the direction of current and voltage change frequently, the arc extinguished
and re-ignited 100 ~ 120 times per second, arc not continuous and stable combustion, making the workpiece heating
time is longer and reducing the strength of the weld.
4.5. INVERTER WELDER DISADVANTAGES:
Inverter welding machine mainly related to more electronic components, complex structure, production process
debugging, testing, parameter setting difficult.
5. OXY-ACETYLENE WELDING
5.1. The difference between acetylene and oxygen equipment.
Oxygen equipment Acetylene equipment
1. Composition. Oxygen/Nitrogen Carbon/Hydrogen
2. Colour. Black Maroon
3. Thread. Right hand thread. Left hand thread.
4. Content pressure. 220kg/cm2 43kg/cm2
5.2. What is the burning temperature of Acetylene mixed with Oxygen?
3100°C to 6000°C
5.3. Label the drawing of the Oxygen and Acetylene bottles.
Oxygen
A. Escape valve.
B. Steel casting
C. Gas (Oxygen)
Agricultural Technology Grade 11 51
Acetylene
A. Escape valve.
B. Steel casting.
C. Protective covering.
D. Gauze wire filter.
E. Porous upper layer.
F. Porous mass with dissolved acetylene.
5.4. What is the function of the pressure regulator?
Lower the high pressure of the gas in the cylinder to the lower pressure needed for welding.
5.5. Name the two pressure gauges found on the regulators.
Cylinder pressure gauge.
Supply gauge.
5.6. Can you use oil on any of the parts of the acetylene set?
No. Oil and grease can cause an explosive mixture if combined with acetylene.
5.7. How can leakages be traced on the acetylene welding set.
Leakages can be traced with a soap water solution. Do not use a match!
5.8. What must the working pressure be of Acetylene and Oxygen?
60 Kpa
52 Agricultural Technology Grade 11
5.9. Label the sketch of the Welding and Cutting torch.
5.10. What is the function of the high pressure welding torch?
Serves as a mixing apparatus in order to allow equal volumes of oxygen and acetylene to leave the welding torch
nozzle.
5.11. Describe the mounting of the apparatus.
a) Prop up both cylinders and fasten them to prevent them from toppling.
b) Open both cylinders instantaneously to clean the openings from dust.
c) Ensure that there is no oil/grease on apparatus.
d) Connect high pressure rubber tubing to the pressure regulator.
e) Turn both cylinders valves open for a instant to clean dust from rubber tubing.
f) Connect the other ends to the torch.
g) Fit the required size nozzle to the torch.
5.12. Describe the lightning and adjustment of the flame.
a) Ensure that there are no flammable materials around.
b) Ensure that the work piece are correctly set up, and that the correct filler rod, flux, welding goggles and
lighter are at hand,
c) Turn the cylinder valves open through one full turn.
d) Set the pressure regulators at the correct pressure. 60 kpa.
e) Turn the acetylene valve slightly open and light the flame.
f) Adjust the acetylene until the flame stops smoking.
Agricultural Technology Grade 11 53
g) Turn the oxygen until the blue inner cone of the flame is clearly visible.
5.13. Describe how you would turn of the apparatus after you have finished a job.
a) Turn off the acetylene supply first and then the oxygen.
b) Close the cylinder outlet valves.
c) Open the torch valves to release the pressure in the pipes.
d) Loosen the pressure regulator screws.
5.14. Label the following diagram of the oxy-acetylene flame.
5.15. Which part of the flame is the hottest?
B. Is the hottest part of the flame.
5.16. Name, draw and give the function of the three types of oxy-acetylene flames.
A. Neutral flame.
General welding.
Thicker metal plates.
B. Carburizing flame.
To weld aluminium.
C. Oxidising flame.
Used for welding brass and for brazing.
Thinner metal plates.
54 Agricultural Technology Grade 11
5.17. Draw, name and describe the three methods of acetylene welding.
a. Leftward welding technique.
Used to weld mild steel sheet up to 5mm
b. Rightward welding technique.
Used to weld mild steel sheet thicker than 5mm.
c. Vertical welding.
Welding starts at the lower end of the weld, and then moves upwards to the end of the work piece.
5.18. What is meant with brazing?
• Oxy-acetylene welding, with bronze rods.
• Bronze work needs a flux when brazing/welding.
5.19. What device is used to keep flames from going back into the pipes and cylinders of the oxy-acetylene set,
preventing an explosion?
• Flash back arrester.
Agricultural Technology Grade 11 55
5.20. The illustration below shows a flame of the oxy-acetylene welding set with the different temperatures
shown on the graph. Analyse the illustration and answer the questions that follow.
A B C
a. Identify the hottest part of the flame and indicate this temperature
• B1600 °C or 2912 F.
b. Where will you position the work piece in relation to the flame if you look at the graph in the
picture?
• Just in front of the white flame. At point B.
c. Is this flame used for cutting or welding?
• Welding.
d. Identify this type of flame and give two uses.
• Neutral flame. a) Welding of mild steel.
b) Welding of copper.
5.21. Describe the procedure that you should follow when welding two pieces of metal with the aid of an acetylene welding set.
Using the back hand welding technique.
1. Set up a cleaned work piece of -5mm or less in thickness.
2. Put on the welding goggles.
3. Light up the torch to give a neutral flame.
4. Place the goggles over your eyes and take a 3 mm copper coated welding rod.
5. Starting at the beginning of the joint, hold the welding torch so that its tip forms an angle of approximately 45 degrees
with the work piece.
56 Agricultural Technology Grade 11
6. Hold the flame steady over the work piece with the inner flame approximately 3 mm above the surface to be welded.
7. When the work piece has heated up sufficiently it melts and forms a pool.
8. To prevent a hole being burnt through the metal, lift the torch tip slightly to keep the pool small.
9. When you have established the pool, place the end of the filler rod at a 45 degree angle in the centre of the pool This
forms a weld as you move forward steadily.
10. As the weld progresses the filler rod melts and has to be continually fed into the weld. The longer you hold the filler
rod in the pool, the larger the build up of the weld.
Agricultural Technology Grade 11 57
6. DIFFERENT WELDING JOINTS AND WELDING SYMBOLS
Welding is a method for the permanent assembly of metal parts.
6.1. What Are the Different Types of Weld Joint?
A weld joint is used to join two pieces of metal together.
This is done by melting the two metal pieces and then using a filler to join them.
6.2. There are several different types of weld joints that can be used in this process:
6.2.1. Butt weld joint
• When two pieces of metal are joined end to end, a butt weld joint is used.
• Butt joints are frequently used when a smooth weld face is desired.
• Some applications that use butt joints are pressure vessels, piping and tanks.
• There are several variations on the butt joint, including the square joint, the grooved butt joint, the single “V” joint,
and the double “V” joint.
• The variation that is used in each application depends on the thickness of the metal and the required strength of
the joint.
6.2.2. Corner weld joint
• A corner weld joint is used when two pieces of metal are to be joined at a right angle.
• When finished, this creates an “L” shape between the pieces.
• Two types of this joint are the closed weld and the open weld. In a closed weld, the metal pieces are joined flush
against each other.
• An open weld, on the other hand, only joins the metals together at the edges so the joint is open.
6.2.3. Edge joint
• Another type of weld joint is the edge joint.
• This weld is used when two pieces of metal that are parallel at the edges need to be joined.
• This joint is commonly made with a partial penetration weld.
• This means that the filler only fills up part of the gap between the metals.
• Grooves can also be put into the edges so that the filler can penetrate deeper into the joint.
6.2.4. Lap joint
• In order to joint two pieces of metal that overlap, the weld joint known as a lap joint is used.
• There are two types of lap joints: single-fillet laps and double-fillet laps.
• In a single-fillet lap, the filler metal is inserted along one seam of the overlapping metals.
• This type of joint is ideal when the joint will not be subjected to heavy loads.
• In cases where the joint will be subject to a heavy load, a double-fillet lap joint is a better choice.
• In a double-fillet lap joint, the filler is inserted along both the top and bottom seam.
58 Agricultural Technology Grade 11
6.2.5. Tee joint
• A tee joint is a weld joint that joins two pieces of metal at a right angle, forming a “T” shape. Applications
of this joint include structural steel and tubing.
• Different variations of this joint include the square tee joint, the bevelled tee joint and the double bevelled
tee joint.
• The square tee joint can be used on materials that are thick or light.
• For more strength or when a joint can only be welded from one side, a bevelled tee joint can be used.
• Double bevelled tee joints can be used for heavy loads and is welded on both sides of the joint.
Fillet T- Weld
Agricultural Technology Grade 11 59
V-But weld
The sketch shows a bud weld and the welding sequence when joining two pieces of metal with the aid of an arc welding
machine.
60 Agricultural Technology Grade 11
BUTT, LAP, TEE, CORNER, EDGE
Agricultural Technology Grade 11 61
Before welding, the place of welding of the parts should be prepared.
There exist several types as shown in Figure 2. The type to be used is decided according to thickness of the parts to
be welded.
For thicker parts grooves can be formed to have a complete penetration of weld. For thinner parts the edges can be
blended.
Weld types, sizes and positions must be translated into symbols so that when a drawing is read, all the necessary
information about a particular weld is clearly known.
62 Agricultural Technology Grade 11
Figure 4 gives the general welding symbol.
Welding drawing shows a unit or part made of several pieces of metal, with each welded joint described and specified.
(e.g. Fig.15)
Agricultural Technology Grade 11 63
64 Agricultural Technology Grade 11
Agricultural Technology Grade 11 65
7. THREAD CUTTING TAPS, DIES AND CUTTING OILS
7.1. What is the function of a thread cutting tap?
• Taps are used to cut thread on the inside of a nut or hole. (Inside thread)
• Three nut tapers are found. First tap Second tap and Third tap.
• Taps are clamped into a torque bar when in use.
• First a shallow groove is cut with the first tap, then a deeper cut with the second tap;
• And then the final cut with the third tap.
7.2. What is the function of a thread cutting die?
• Dies are used to cut thread onto bolts or rods. (Outside thread)
• Dies are clamped into a stock when in use.
7.3. What is the function of a thread cutting nut?
• It is not used for cutting new thread but to clean damaged thread.
7.4. What is the function of thread, cutting oils?
• Facilitates the cleaning and cutting of thread.
• Tools last longer if the correct cutting liquid is used.
8. LOCKING DEVICES
A. Hex Type Head Bolts & Nuts
• Such products are made using high grade raw material. These products are widely popular in the market because
of their noted features such as high durability, tensile strength and receptivity to extreme conditions.
66 Agricultural Technology Grade 11
B. Name Plate Rivets
• Round head machine screws that are available in different sizes and come with circular heads. The effective use
of modern machining techniques and quality raw material makes them have a better finish and longer service life.
C. Hex Nuts
• These full threaded Nuts are made from quality steel and other alloys, and find applications in various industries.
Various industrial automotive nuts provided by us can be availed in various sizes and shapes. These nuts are
highly durable and precisely designed.
D. Allen Cap Bolts
• An Allen key is needed for allen cap screws to do them up. These are ideal and look as a nice alternative to hex
set or pan head screws, for example on a crankcase side or a flywheel cowling. Further, these may also deter the
Agricultural Technology Grade 11 67
casual thief, as any screw can be undone with a screwdriver or adjustable spanner. Whereas, everyone cannot
carry allen keys around. The length refers only to the length of the threaded section and the other size is the
thread size which is not the size of the allen key for adjusting it.
Features:
• Corrosion resistance
• Strength
• Low maintenance
• Durable
E. POP RIVETS
Blind rivets
Three aluminum blind rivets: Pop rivet gun
Blind rivets
• Commonly referred to as pop rivets (POP was a brand name of the original blind rivet manufacturer, now owned
by Emhart Technologies) are tubular and are supplied with a mandrel through the center.
• The rivet assembly is inserted into a hole drilled through the parts to be joined and a specially designed tool is
used to draw the mandrel into the rivet.
• This expands the blind end of the rivet and then the mandrel snaps off.
• These types of blind rivets have non-locking mandrels and are sometimes avoided for critical structural joints
because the mandrels may fall out, due to vibration or other reasons, leaving a hollow rivet that has a significantly
lower load carrying capability than solid rivets. Furthermore, because of the mandrel they are more prone to
failure from corrosion and vibration.
• Unlike solid rivets, blind rivets can be inserted and fully installed in a joint from only one side of a part or structure,
“blind” to the opposite side.
68 Agricultural Technology Grade 11
Advantages of “Blind” POP Rivets
The ability to set POP rivets without the need for access at the back of the work makes their use mandatory in many
instances. However, their many additional advantages make POP rivets the logical choice in numerous applications
where the blind setting feature is not of primary importance, such as:
• Low in-place costs
• Fast assembly
• Low-cost, lightweight, easily portable tools
• Vibration-proof assembly
• No surface marring
• Exceptional versatility
• High grip and pull-up strengths
• Tamperproof
• Increased design flexibility
Typical Applications:
• Air bags
• Appliances
• Overhead doors
• Truck trailers
• Acoustical ceiling
• Personal watercraft
• Overhead lighting
• RVs
Advantages of the bolt and nut over the use of rivets?
• Bolts can be placed in cold.
• This is easier and safer and less time consuming.
• Bolts can be undone.
• Bolts can be tightened to a certain torque so that you know what stress it is applying.
Agricultural Technology Grade 11 69
F. LOCK NUTS and LOCKING DEVICES
• Many different locking devices are used to prevent nuts from working loose.
• The following figure illustrates various locking devices.
• A screw thread holds securely unless the parts are subject to impact and vibration (e.g. as in a car engine).
Various locking devices
• A common device is the jam nut (A). Slotted nuts (L) and castle nuts (M), to be held with a cotter or wire, are
commonly used in automotive industry.
• Round nut locked by means of setscrew is shown at B. A brass plug is placed under the setscrew to prevent
damage to the thread. This is a common type of adjusting nut used in machine-tool practice.
• C is a locknut, in which the threads are deformed after cutting.
• D, E and F are spring washers, also commonly used for locking.
• In J a special tab is bent to secure the nut. At K, L and M, a particular pin known as a cotter pin is inserted through
both nut and bolt, and then spread.
G. WASHERS
• Plain washers are commonly used in the assembly of nuts and bolts to provide a smooth surface for the nut or
bolt to turn against.
• Lock washers prevent a fastener from loosening due to vibration or stress.
H.KEYS
• Key fasteners are used to prevent the rotation of wheels, gears etc. on their shafts.
I.SPRINGS
• A spring can be defined as an elastic body designed to store energy when deflected.
• Springs are classified according to their geometric form: helical or flat
70 Agricultural Technology Grade 11
HELICAL SPRINGS
• Helical springs are further classified as: (1) Compression, (2) Extension, and (3) Torsion, according to the
intended action.
• Compression springs are wound with the coils separated so that the spring can be compressed
• Extension springs are wound with the loops in contact so that the spring can be extended, and the ends are
usually made as a loop. Special ends are sometimes required.
• Torsion springs are wound with closed or open coils, and the load is applied torsionally (at right angles to the
spring axis). The ends may be shaped as hooks or as straight torsion arms.
Agricultural Technology Grade 11 71
9. General questions
1. Name SIX types of locking devices that can be used to make sure that the nuts of bolts does not become loose.
a) Split pin.
b) Castle nut.
c) Spring washer.
d) Tab washer.
e) Locking plate.
f) Lock nut.
2. What is the main function of these locking devices?
FLAT SPRINGS
• A Flat spring can be defined as any spring made of flat or strip material.
It is used to ensure that the nut will not become loosen as a result of vibration or prolonged strain caused by the
performance of the machine.
72 Agricultural Technology Grade 11
3. Name TWO main functions of the spring washer?
a) Absorb slackness and tension between various components.
b) Serve as a thrust bearing.
4. Describe the working of the tab washer?
The one tab of the washer is bent downwards over the edge of the metal, while the other tab is bent upwards against
the side of the nut.
Agricultural Technology Grade 11 73
CHAPTER 5
TOOLS, EQUIPMENT AND IMPLEMENTS
ELECTRICAL PORTABLE WORKSHOP TOOLS
Occupational Health and Safety Act, 1993
1. PORTABLE ELECTRIC TOOLS
1.1. No user shall permit the use of and no person shall use a portable electric tool the operating voltage of which
exceeds 50 volts to earth unless -
a. it is connected to a source of electrical energy incorporating an earth leakage protection device, the
construction of which meets the requirements of a safety standard incorporated for this purpose in these
regulations under section 36 of the Act; or
b. it is clearly marked that it is constructed with double or reinforced insulation.
1.2. No person shall sell a portable electric tool constructed with double or reinforced insulation referred to in sub
regulation (1) (d) unless -
a. it is clearly marked that it is constructed with such insulation; and
b. its insulation is constructed in accordance with a safety standard incorporated for this purpose in these
regulations under section 36 of the Act.
1.3. No person shall use or permit the use of a portable electric tool which is not fitted with a switch to allow for easy
and safe starting and stopping of the tool.
1.4. The user shall maintain every portable electric tool, together with its flexible cord and plug, in a serviceable
condition.
2. CHAIN SAW
2.1 General
• Chain saws are some of the most widely used power tools at home and in the workplace.
• They also have the potential to be among the most lethal.
• Whether it is the farmer cutting firewood or cleaning an area or a logger clearing land, proper personal
protective equipment (PPE), training and technique are the keys to preventing injuries.
• Most chain saw injuries involve contact with the cutting chain, which results in severe injury to the hands,
legs, feet and head.
• Preventing such injuries in the workplace requires a joint effort on the part of both employee and employer.
• Employees should use proper personal protective equipment, chain saws with the latest safety equipment
74 Agricultural Technology Grade 11
and proper techniques when cutting.
• Employers must provide chain saw safety training and supervision.
• Chain saws are also great when you are interested in getting up close and personal with gasoline power.
• If you want to see a basic two-stroke engine in its simplest application, then a chain saw is the best place
to start!
2.2 Chain Saw Safety Training and Supervision
Chain saw operators must receive training. The most effective training includes a combination of classroom and hands-
on instruction. Depending on the experience of the chain saw operator, training should include instruction on:
• safe working techniques
• basic information about the chain saw, components, design and limitations
• stopping and starting
• cleaning and servicing
• kick back prevention
• chain sharpening
• PPE use and limitations
2.3 General Chain Saw Safety Precautions
Before using a chain saw it is important to read the owner’s manual and familiarize yourself with safe operation. Giving
a chain saw to an inexperienced worker without proper training is an injury waiting to happen.
2.4 Before each use, check that:
• chain saw is in good general condition (no leaks or damage).
• the throttle, safety throttle lock and stop switch operate correctly.
• the chain brake works.
• the chain is lubricated, sharp and tensioned correctly.
• the sprocket and bar are in good condition..
• the idle is properly adjusted.
2.5 When starting a chain saw, it should always be started on the ground or a well supported and stable surface.
Drop starting a chain saw is dangerous and prohibited by OSHA. A drop start is done by thrusting the saw down
with your left hand and pulling the starter cord up with your right hand.
2.6 When refueling a chain saw:
• avoid smoking
• be at least 10 ft (3m) from any open flame or other ignition source
• choose a clean
• refuel only after the motor has cooled
• wipe off any fuel that spilled on to the saw
• use safety cans to store fuel
• keep a fire extinguisher or shovel nearby
Agricultural Technology Grade 11 75
The chain saw must be shut down whenever it is carried. Whenever possible, use the bar cover. A saw should be carried
by its front handle with the chain bar pointing to the rear. Do not carry the chain saw on your shoulder. If you lose your
balance, you will not be able to use your arm to break your fall.
2.7 After completing work, the following maintenance needs to be completed:
• clean the saw, especially the air filter, cooling inlets and sprocket
• reverse chain bar, top to bottom, to prevent wear and burring
• clean chain brake
• clean out chain bar groove
• sharpen saw chain
3. GRINDING MACHINES (Occupational Health and Safety Act, 1993)
1. The user of a power-driven grinding machine shall cause such machine to be marked in a conspicuous place with
the manufacturer’s rated speed or speeds of the spindle in revolutions per minute.
2. No user shall require or permit a grinding wheel of a power-driven grinding machine to be operated at a speed
exceeding that of the manufacturer of such wheel: Provided that a grinding wheel larger than 100 mm in diameter
shall only be used at the recommended operating speed.
3. The user shall cause every grinding wheel of a power-driven grinding machine to be mounted concentrically on
the spindle by means of robust metal flanges.
4. Having regard to the nature of the work which is performed, the user shall cause every power-driven grinding
machine to be provided with a substantial guard which shall enclose the grinding wheel as far as practicable and
which shall be of sufficient strength to withstand the force of impact of a rupturing wheel.
5. Having regard to the nature of the work which is performed, the user shall cause a power-driven grinding machine
where the work piece is applied to the wheel by hand, to be provided with a substantial adjustable work rest, which
shall be securely fixed in position and adjusted to within 3 mm from the grinding face of the wheel.
6. The user shall cause every power-driven grinding machine to be provided with a strong transparent shield which
shall be kept adjusted to as to protect the operator’s eyes.
7. The user shall cause a notice to be posted in a conspicuous place at every power-driven grinding machine,
prohibiting persons from carrying out, inspecting or observing grinding work without using suitable eye protection.
76 Agricultural Technology Grade 11
4. ANGLE GRINDER
4.1 Using an angle grinder
The angle grinder uses an electric motor to drive an abrasive disc at high speed. The objective of this procedure is to
show you how to correctly use an angle grinder.
4.2 Part 1. Preparation and safety
• Whenever you perform a task in the workshop you must use personal protective clothing and equipment that is
appropriate for the task and which conforms to your local safety regulations and policies. Among other items, this
may include:
• Work clothing - such as coveralls and steel-capped footwear
• Eye protection - such as safety glasses and face masks
• Ear protection - such as earmuffs and earplugs
• Hand protection - such as rubber gloves and barrier cream
• Respiratory equipment - such as face masks and valve respirators
If you are not certain what are appropriate or required, ask your supervisor.
4.3 General Safety
• Always wear impact-resistant protective glasses, ear protection and a full-face shield when using an angle grinder.
• Disconnect the power supply when changing any grinding attachments or discs.
• Wear safety shoes, leather gloves and an apron to protect your body from flying metal chips. Make sure the blade
guard is firmly secured.
• Use the correct type of disc.
• Make sure the guard handles are secure.
• Use the correct flange or spindle nut for the type of disc being used. If you don’t, the disc can shatter at high speed
and injure you.
• Angle grinders, like all portable grinding tools, need to be equipped with safety guards to protect you from flying
fragments in case the disc breaks apart.
• Always follow the manufacturer’s recommendations to make sure the spindle wheel does not exceed the abrasive
wheel specifications.
• Make sure there are no obvious defects or damage to the disc before you install it.
Agricultural Technology Grade 11 77
• Everyone who uses an angle grinder must receive training and instruction in safe work procedures.
• Make sure that you understand and observe all legislative and personal safety procedures when carrying out the
following tasks. If you are unsure of what these are, ask your supervisor.
4.4 Points to note
• The angle grinder uses an electric motor to drive an abrasive disc at high speed.
• The grinder disc is turned at speeds that range from 5,000 rpm to 12,000 rpm.
• The turning disc is used to grind or cut metal.
• The grinder size relates to the diameter of the cutting disc. This can range from 100 mm to 230 mm (4 inches to
9 inches). The size of grinder you use depends on the type of job you are doing.
• The smaller the grinder, the higher the speed it turns.
• Sanding discs and wire wheels can be fitted on the grinder, making it a versatile electric tool.
• An extra handle is provided that is attached to the grinder head. This can be fitted to the left, right or top of the
head to make it easy to use for left-handed as well as right-handed people.
• The abrasive disc or cutting wheel is attached to the grinder by a flange and nut. The nut is specially designed to
fit in a recess in the centre of the pad or wheel. It is tightened by a spanner that is provided with the grinder when
purchased. Do not lose this wrench because it is the only tool that can tighten the nut properly.
• When using cutting discs you should always use the edge of the disc rather than the face.
• Do not confuse a grinder with a sander/polisher. The sander/polisher turns at lower speeds, typically 600 to 3,000
rpm. They are commonly used to sand and polish paint work.
4.5 The photo shows an angle grinder that can be used for various purposes.
4.5.1 Name TWO functions of this device?
Cut steel, concrete.
Grinding. Finishing off,,
78 Agricultural Technology Grade 11
4.5.2 Indicate whether this tool uses single or three-phase electricity.
Give a reason for your answer.
• Single phase.
• Only large heavy-duty machines use three-phase electricity.
4.5.3 Basic grinding procedures with grinding machines
• Do not bump the wheel when starting to grind or while grinding
• Do not use excessive pressure, allow the wheel to do the work
• RPM of wheel must never exceed the specifications on the wheel.
• DO NOT USE WITHOUT MACHINE GUARD.
• Wear eye protection.,,
5. BENCH GRINDER
UNDERSTANDING THE BENCH GRINDER
• The bench grinder turns an abrasive wheel or wire brush wheel at high speed.
• These wheels are used to remove metal from a work piece, sharpen tools and clean parts.
• The objective of this procedure is to show you how to set up, adjust and use a bench grinder.
5.1 Part 1. Preparation and safety
5.1.1 Whenever you perform a task in the workshop you must use personal protective clothing and equipment that is
appropriate for the task and which conforms to your local safety regulations and policies. Among other items,
these may include:
• Work clothing - such as coveralls and steel-capped footwear
• Eye protection - such as safety glasses and face masks
• Ear protection - such as earmuffs and earplugs
• Hand protection - such as rubber gloves and barrier cream
• Respiratory equipment - such as face masks and valve respirators
If you are not certain what are appropriate or required, ask your supervisor.
5.2 General Safety
• Stand to the side of the grinder when starting the electric motor.
• Always wear full-face protection, ear protection, leather gloves and a leather apron.
• Use the safety shield fitted to the grinder. If it has been damaged, replace it.
• Do not grind on the side of the wheel because it may cause the wheel to shatter.
• Make sure you understand and observe all legislative and personal safety procedures when carrying out the
following tasks. If you are not sure of what these are, ask your supervisor.
Agricultural Technology Grade 11 79
5.3 Points to note
• The bench grinder turns an abrasive wheel or wire brush wheel at high speed. These wheels are used to remove
metal from a work piece, sharpen tools and clean parts.
• The type of wheel you use will depend on the type and the hardness of the material.
• Whether you are grinding or polishing, use the correct wheel for the material you are grinding or buffing.
• Ask your teacher to demonstrate the differences between grinding wheels for soft and hard materials and wire
brush wheels.
• As the abrasive wheel wears down, the gap between the wheel and the tool rest will increase.
• Make sure the tool rest is as close as possible to the grinding wheel, but not touching it. It needs about a 1/16th
of an inch (1.5 mm) gap.
• The face of the abrasive wheel must be kept square. This is done with a dressing tool, which removes some of
the abrasive compound.
• If the abrasive wheel is not square, ask your supervisor to demonstrate the use of the dressing tool.
• When grinding metal, it must not overheat. This will affect its hardness. If the metal becomes too hot and is
allowed to cool slowly, it may become soft. If it is cooled quickly (quenched), it may become brittle.
• As you shape the metal, dip it into the water pot attached to the bottom of the grinder. This will prevent the metal
from getting too hot.
• Some bench grinders are not supplied with a water pot. If this is the case, you will need to have a water pot
located near the grinder so that you can cool the piece you are grinding.
5.4 Component identification
• Some parts of this illustration are labelled. It is important to learn the names of these equipment components.
5.5 Part 2: Step-by-step instruction
1. Set up the bench grinder
Before you start using the bench grinder, it’s vital that you set it up correctly. When operating, the abrasive wheel turns
at high speed and produces dangerous and hot flying particles and sparks. Make sure the grinder is both switched off
and disconnected from the power supply before you attempt to adjust it.
2. Use the correct safety equipment
Certain safety attachments MUST be in place before operating the grinder. They are the wheel guard, the see-through
safety shield, the tool rest, a water pot and a full-face protector.
3. Use the correct wheel
The grinder may have abrasive grinding wheels for removing metal, a wire wheel to clean parts, or both. Make sure the
wheel you’re using is appropriate for the job.
4. Adjust the tool rest
With the correct wheel fitted to the grinder, adjust the tool rest. Position it so there’s at least 1/16th of an inch gap
between the wheel, and the tool rest and that it is the same height as the centre of the wheel. To adjust the tool rest,
locate the adjusting bolt and loosen it with a box wrench. Set the tool rest at the right height and distance from the wheel
and then tighten the adjusting bolt. If you are unsure of how to do this, ask your supervisor.
80 Agricultural Technology Grade 11
5. Safely use the grinder
Connect the grinder to the power supply. Adjust your face protector, stand to the side of the wheel and switch the grinder
on. Once the grinder is up to speed, move to the front of the wheel, hold the part firmly onto the tool rest, and move it
slowly and gently forward until it comes into contact with the wheel. The grinding wheel removes the metal it contacts.
Occasionally dip the part into the water to keep it cool.
6. Shut down
When you have finished, turn off the power and unplug the grinder.
6. ELECTRIC SHEEP SHEAR
The sketch below shows tools that are used to clip the wool and hair of animals.
6.1 The equipment that is shown in the above picture is very expensive and delicate. Name four precautionary
measures that must be followed when using these tools,,
• Make sure that the scissors are sharp and honed.
• Use a little oil on the blade to ensure smooth operation.
• Fasten all screws and nuts.
• Do not injure the animals in any way.
6.2 These tools works with electricity. Name SIX safety precautions that must be followed when working with
electrical equipment.
• Ensure that all electrical connections are tight.
• Check for loose wires.
• Make sure that there is no damage to the extension wire.
• Check that the earth wire is connected.
• Switches must work properly.
• Make sure that the wires are correctly connected inside the 3-point plug. ,,
Agricultural Technology Grade 11 81
7. PEDESTAL DRILLING MACHINE
7.1 Name four uses of the pedestal-drilling machine.
• Drill holes.
• Make holes with mortising apparatus.
• Routing.
• Sanding.
7.2 Name eight hints when working with the drilling machine.
• Correct speed.
• Use correct cutting oil.
• Work piece securely clamped.
• Centre table correctly.
• Use V-block or drill press vice when drilling cylinders.
• Sharpen drill bit.
• Adjust mortise apparatus correctly.
• Never force drill to complete quicker.
7.3 What is the function of the V-block?
• Hold cylindrical objects when drilling.
7.4 Make a neat sketch of the drilling machine and label it.
a) Electric motor.
b) Feed lever
c) Belt guard
d) Spindle
e) Depth control nuts
f) Depth indicator
g) Chuck
h) Drilling table
i) Pillar
j) Drilling table clamp
k) Lower drilling table
l) Base
m) Four step pulley
82 Agricultural Technology Grade 11
7.5 Name and describe the four things that must be adjusted on the drilling machine before using it.
• Drilling belt Choose the correct pulley.
• Chuck and drill bit. Chuck properly tightened. Chuck key removed.
• Drilling table. Drilling table cantered.
• Mortise apparatus. Drill correctly adjusted and firmly tightened.
7.6 Name eight safety measures when working with the pedestal drilling machine.
a) Chuck properly tightened.
b) Remove chuck key.
c) Use V-block when drilling into cylindrical objects.
d) Use pliers when drilling into small objects.
e) Remove all borings with a brush and not the hand.
f) Keep floor around drill clean.
g) Use safety goggles.
h) Switch of the motor and wait until the drill comes to rest before leaving the machine.
Agricultural Technology Grade 11 83
7.7 Name 8 hints when working with the pedestal drilling machine.
• Drill should turn at the correct speed.
• Use correct drill for the different materials.
• Use cutting oil when drilling.
• Clamp work to be drilled.
• Centre the table correctly under the drill.
• Use a V-Block when drilling through round objects.
• Ensure that drill bit is sharp.
• Never force the drill to finish quicker.
7.8 Name the two types of drill bits?
• Morse twist bit.
• Morse taper shank drill bit.
7.9 Make neat sketches of the Morse twist bit and label it.
7.10 Name the three components of the Morse drill bit.
• Manganese chrome shank.
• Spirals made of high speed steel or carbon steel.
• Two flutes at angles of 118 Degrees.
7.11 Name four uses of the Morse drill bit.
• Drill holes in metal, wood or plastic.
• Holes for taking bolts, screws, rivets or pins
• Drilling of tap holes.
• Drilling of holes to remove metal.
7.12 What is the function of cutting oils when drilling holes in metal?
• Keeps drill bit cool.
• Remove borings
• Prevent corrosion
• Drill has a longer lifespan
• Higher cutting speed
84 Agricultural Technology Grade 11
7.13 Draw the table of the cutting liquids.
7.14 Describe the procedure that you should follow when you want to drill a hole in a object.
• Mark the spot where the hole should be made.
• Punch a small hole on the exact spot.
• Choose the correct speed for the drilling machine.
• Choose the correct cutting fluids.
• Drills slowly don’t force the machine.
• Clean away borings with brush.
• If the hole is deep the drill must be raised a few times to help the borings exciting the hole.
Agricultural Technology Grade 11 85
8. PORTABLE ELECTRIC DRILL
The effective use of hand tools require specific knowledge of the parts and application of the tool used. Study the
sketch below and answer the questions that follow:
8.1 Two important parts of the electrical hand drill, A and B, is shown in the picture.
Name these parts and give one use of each.
A. Chuck. Holds the drill bit.
B. Drill bit. Cuts the metal.
8.2 The tool indicated in the sketch can be used for various applications. Name TWO primary applications.
• Drill holes into metal/wood/concrete.
• Loosening/fastening screws/nuts.
9. ANIMAL HANDELING FACILITIES, TOOLS AND EQUIPMENT
Purpose of animal handling facilities and tools:
• The purpose for such is to make the handling of animals more efficient, easier, safer and quicker. (Learners
must be able to identify the different tools and know the purpose of each.)
Loading ramp Close self-feeder Open self-feeder
Crush pen with neck clamp Neck clamp Tattoo Pliers
86 Agricultural Technology Grade 11
Pistol-Grip Syringe Disposable Syringes Paint Branding Iron
Freeze Branding Iron Emasculatome (Burdizzo) Electric Dehorner
Barnes Dehorner Elastrator Ear Tag Plier Ear Notcher
Drench Gun
Agricultural Technology Grade 11 87
10. PLANTERS
The picture below shows a tractor and planter in the field.
10.1 Name the procedures that have to be followed when the planter is stored after the planting season.
• Clean the planter, pipes, fertilizer tanks and seed containers properly.
• Fix broken or damaged parts immediately.
• Release the tension on all drive belts.
• Remove all chains, clean and oil them, and replace them.
• Dismantle all slip clutches, clean them and reassemble them but do not put the springs under tension.
• Paint or cover all unpainted areas with a thin layer of grease.
• Grease all grease nipples.
• Store planter in a dry place, under cover.
10.2 Name THREE safety precautions that must be followed when working with this machine.
• Do not let people or animals come near the drive or gear mechanisms or working parts of the machine while
working.
• Make sure that all safety devices are in place and in working order.
• No person other than the operator may ride or climb on top of the machine.
10.3 Describe the procedure to follow when this machine is prepared for use.
• All grease points must be well greased.
• The correct tension must be set for all belts or chains.
• Check that all parts are functioning correctly by operating it slowly.
88 Agricultural Technology Grade 11
• Replace all worn parts immediately especially the shear blades.
• Service according to manufacturer’s specifications.
• Make sure planter is calibrated correctly.
11. KNAPSACK SPRAYER
Other sprayers have tanks that are carried on a person’s back. The tank is connected to a hose that has a wand,
allowing a person more control over what he sprays.
11.1 Discuss TWO safety measures that have to be taken into account when using the knapsack sprayer in an orchard.
• Wear gas mask
• Wear protective clothing skin not to be contaminated,
11.2 Mention two safe practices that you need to carry out on the knapsack sprayer when doing maintenance after a
day’s work.
• When cleaning the container care should be taken not to poison the environment
• Clean properly so that poison does not affect next use,
11.3 How do you expose of empty pesticide containers?
Make holes in it and burn it.,
11.4 Insecticide sprays are a danger to humans, animals and the environment: What safety measures should you
take when working with sprays ?
• • Read labels carefully.
• Follow all spray instructions
• Use product pictograms for wearing safety equipment.
• Insecticides should never be poured in other containers.
• Eating and smoking are prohibited in dealing with sprays.
• All empty containers should be disposed of in the correct way
• All sprays must be locked in a safe storage facility.
Agricultural Technology Grade 11 89
11.5 Maintenance of equipment: Checking pressure gauge: congestion.
• Check pressure gauge
• Open suction filter
• Clean the suction filter.
• Disconnect hoses.
• Deliver regulator.
11.6 Checking oil depositor.
• Check oil level mark.
• Oil color (white)
• Diaphragm pump is broken or cracked.
11.7 Analysis of other equipment.
• Tires and wheels
• PTO shaft intact and in working order .
• Blower hole firmly.
• No sticks in moving parts.
• All loose parts and bolts.
• Spray head nozzles
11.8 Tractor and spraying machines must be washed.
• Soap solution removes sprays on the outside.
• Empty the tank. Clean inside with steam or high pressure water.
• Grass leaves and branches are removed from fan.
• Screens are washed and checked for holes.
• Use a toothbrush for nozzles.
• Turn nozzles by hand.
• Wipe all grease from pump.
• Disconnect pressure spring.
• Apply grease on axis and all parts that rust.
• Wash safety clothing immediately.
• Shower or wash yourself after day of spraying.
12. BOOM SPRAYERS
• Some sprayers have a tank where a substance is stored and long arms that branch out from the tank.
• These can be hooked to a tractor, and as it moves along, the substance from the tank is sprayed through the
arms.
90 Agricultural Technology Grade 11
When applying pesticides on the crops one must be very cautious not to contaminate the environment.
12.1 Name the precautionary measures the worker has to keep in mind when spraying crops with pesticides.
• Make sure the calibration of the sprayer is correctly set for the specific type of pesticide.
• Use gloves when working with poisons.
• Where a mask when working with or near the place where the pesticides are to be applied.
• Discard empty containers safely.
• One must wash immediately If accidental contact with poisons
• Get a doctor’s advice if poisons are swallowed.
12.2 Name three tasks that a person should perform after the spraying job is finished.
• Cleaning must be done at a place where the poison will not affect human, animal or plant life.
• Run clean water through the whole system.
• Check for blockages on the tank, sprayers, nozzles and pipes,
,
Agricultural Technology Grade 11 91
CHAPTER 6
IRRIGATION AND WATER SUPPLY
1. How Do I Choose the Best Irrigation Equipment?
• There are many different types of irrigation equipment available on the market.
• When thinking about choosing the best irrigation equipment, there are many things you might want to consider,
such as your specific irrigation needs, prices, designs, and brands.
• Solid research into these areas could help you make your decision the best one possible.
• In general, irrigation refers to the artificial application of water to soil.
• It generally is an agricultural technique that is used to assist in the growing of crops, providing water to areas that
need it.
• Irrigation supplies may include anything from a simple sprinkler to complex systems of pipes which are used to
distribute water.
• Accordingly, irrigation equipment are usually divided into two categories: residential products used for lawn care
and commercial products that are used by places such as farms.
2. How Do I Choose the Best Irrigation Agent?
• As with any other product, irrigation equipment can vary in quality and price.
• Some companies have a long history for producing irrigation products.
• These suppliers might be a good option to consider if you are looking for a trust-worthy brand with a good
commercial rating.
• While some products might be cheaper in price, there may be problems down the road with their overall quality.
• Many consumer magazines offer reports and comparisons of different irrigation products that might give you an
idea of some of the best options on the market.
• There are many irrigation suppliers that specialize in the field.
• These companies often offer a comprehensive selection of irrigation equipment.
• They might be able to provide recommendations as to the best irrigation equipment for your particular situation.
• Many of these companies also have Websites that can provide information about supplies, product descriptions,
and prices.
• Some also may provide technical assistance.
• This can be an invaluable help, assisting you with any installation problems or questions about how the products
work.
• If you need a variety of different equipment, it could be a good idea to choose to order from the same supplier.
• This can help you establish a good relationship with your supplier and maybe even enable you to receive a
reduced price for bulk orders.
• Many suppliers offer refunds or rebates on their supplies which can be of help if some of the irrigation equipment
you have chosen are not the best fit for the job.
• Some suppliers also might offer residential packages where a variety of irrigation equipment are sold together.
• Ordering a pre-existing package might help simplify your life by eliminating some of the work in choosing individual
irrigation equipment.
92 Agricultural Technology Grade 11
PUMPS
3. ELECTRICAL SUBMERSIBLE PUMP
3.1. Which type of pump can be submerged motor and all?
• Electrical submersible pump
3.2. Describe the construction of the electrical submersible pump.
• Pump consists of a number of drivers also known as stages that are mounted on top of one another.
• The larger and the greater number of stages, the more water is pumped at the same speed.
• Each stage consists of a turbine and swirl.
• The purpose of the turbine is to increase the water speed by means of centrifugal force and then bring it back
into the swirl.
• This last action transforms the speed into pressure before being taken to the next turbine.
• These stages are rigged inside a pipe that in turn is rigged to a pipe through which the water is pumped.
• Below these stages a watertight motor is connected.
• As soon as the power is switched on the motor turns the stages that perform the pump action.
• Water is pumped through the motor to cool it.
3.3. Name the advantages of the electrical submersible pump.
• It is easy to install.
• No maintenance needed.
• Can be pulled out of a borehole quickly.
• Lasts a lifetime.
• Delivers as much water as any other pump.
• Water at a very high pressure can be supplied.
3.4. Name the disadvantages of the electrical submersible pump.
• If motor is not 100% watertight it can be damaged.
• Pump can only be driven by electricity.
Agricultural Technology Grade 11 93
3.5. Sketch of the electrical submersible pump.
4. JET PUMP
4.1. Where are such pumps commonly used?
a) Deep boreholes.
b) Wells.
c) Open streams.
4.2. What can you use with this pump when water has to be pumped beyond the capabilities of the pump?
Injector
4.3. Describe the working of this pump.
• At the bottom end of the suction pipe a foot valve is mounted, to prevent water in the pump to flow back during
rest periods.
• Just above the foot valve a venturie is build into the suction pipe.
• Inside the venturie an injector is installed.
• As soon as the pump is switched on, a part of the water with which the pump has been filled beforehand, is
pumped back to the injector.
• The extra amount of water that is now injected into the suction pipe creates an increased suction in the venturie.
• This increased suction force, together with an increased flow rate in the suction pipe, created by the injector,
results in the pump working effectively.
• Care should be taken to ensure that the whole system is filled with water and be free of air. All joints must be
airtight.
94 Agricultural Technology Grade 11
4.4. Name the advantages of this type of pump.
a) No rods are required.
b) Water can be drawn from great depths using the injector.
c) Simple construction.
d) Almost no maintenance necessary.
e) It is a high-pressure pump.
4.5. Sketch of the jet pump
5. ROTARY PUMP
5.1. Where are these pumps used.
• Very deep boreholes.
5.2. What is the function of the pump head?
• Transfer power from the engine to the pump.
5.3. What is the function of the sieve or grid?
• Keep out coarse objects or stones that can damage the element.
5.4. What is the function of the non-return valve?
• Keep the water from flowing backwards into the pipe.
5.5. Describe the working of the rotary pump.
• The movement of the pulley on the pump head is transferred to the rotor or worm by means of a shaft.
• The rotor is spiral shaped and revolves inside the rubber stator.
• The revolving motion of the spiral forces the water upwards, delivering a constant stream of water.
• The water thrust upwards is replaced by water sucked through the foot valve.
Agricultural Technology Grade 11 95
5.6. Name the advantages of the rotary pump.
• The supply of the rotary pump is in direct ratio to the pump speed.
• Increase or decrease pump speed for more or less water.
• Pressure height is not related to pump speed.
• Parts that can wear is restricted to the minimum.
• Flexible stainless steel shaft eliminate a number of working parts.
• Drive unit is mounted at ground level that makes repair easier.
• Any power unit can drive rotor.
5.7. Name the disadvantages of the rotary pump.
• The pump has to be driven from the surface with a shaft.
• Direction of revolution must always be maintained to prevent the shafts from becoming unscrewed.
5.8. Sketch of the rotary pump.
6. CENTRIFUGAL PUMP
,The illustration below shows an electrical motor that is connected to a centrifugal pump:
96 Agricultural Technology Grade 11
6.1. Describe the working of the centrifugal pump.
• The impeller rotates fast in the direction indicated by the arrow.
• The vanes on the impeller force the water outwards through the outlet pipe.
• Water moving outwards is replaced by water sucked into the pump via the foot valve and suction pipe connected
to the inlet.
• This action is possible because there is no air that can be compressed inside the system.
6.2. Where can this pump be used effectively?
• Irrigation pumps in rivers.
• Pumping from streams.
• Pumping from dams.
• Pumping from wells
6.3. Name NINE aspects that should be considered before deciding on which type of pump to use.
• Purpose.
• Required delivery.
• Water quality.
• Availability of driving power.
• Mobility of the pump.
• Simplicity of construction.
• Attention required
• Cost and availability of parts.
• Do-it-yourself installing.
6.4. Sketch of the centrifugal pump.
Key
1. Drive shaft
2. Oil seal
3. Oil seal
4. Cir clip
5. Ball bearing
Agricultural Technology Grade 11 97
6. Grease nipple
7. Ball bearing
8. Oil seal
9. Water swinger
10. Flange
11. Packing flange
12. Graphite packing
13. Bearing housing
14. Impeller
15. Flat washer
16. lock bolt
17. Nut
18. Spring washer
19. Stud
20. Bleeding nipple
21. Casing
7. General questions
7.1. Name FOUR safety measures when working with electrical pumps and motors.
• Ensure that overload protector/earth leakage protector is functional.
• Electrical connections must be covered or well insulated.
• Earth wires must be connected and in working order.
• Belts, pulleys and couplings must be safely covered.
7.2 The major types of water pumps available on the market are listed below:
A. Centrifugal pumps
B. Rotary pumps
C. Submersible pumps
D. Jet pumps,,
98 Agricultural Technology Grade 11
Choose from the list the pump that matches the description of the questions, by writing only the symbol that represents
the pump.,,
• A pump that is maintenance free and can be submerged motor and all.
C (Electrical submersible pumps). ,,
• A pump that is used in very deep water holes and is working with a shaft.
B (Rotary pumps). ,,
• A pump that forces water through the pipes with vanes on the impeller and is movable.
A (Centrifugal pumps). ,,
PIPES
8. GALVANIZED PIPES.
8.1. Name 2 uses of galvanized pipes.
• Hot or cold water supply.
• Erection of tank stands, straining posts or verandas.
8.2. Name seven advantages of galvanized pipes.
• Longer live.
• Cannot be constricted by roots.
• Robust.
• Need no paint.
• Cannot be damaged by digging.
• Easily be joined.
• Resist high pressures.
8.3. Name the disadvantages of galvanized pipes.
• Heavy and do not handle easily.
• Need a lot of labour to install.
• Large number of leaks represents potential leaks.
• Difficult to weld.
• Relatively expensive.
9. CONCRETE PIPES.
9.1. Uses of concrete pipes.
• Carry water over long distances.
• Under roads for drainage.
• Used as wire posts (Filled with concrete)
Agricultural Technology Grade 11 99
9.2. Advantages of concrete pipes.
• Withstand high pressure.
• Never rust or corrode.
• Long lifespan.
• Cannot be compressed by tree roots or traffic.
• Need no protective covering.
• Cannot be damaged by digging
9.3. Disadvantages of concrete pipes.
• Very heavy.
• Difficult to work with.
• Hard and brittle, and crack easily.
• Only available in short lengths.
• Large number of joints means potential leaks.
10. PLASTIC PIPES (PVC)
10.1. Uses of PVC pipes.
• Used for installing of water supplies over long distances.
10.2. Advantages of PVC pipes.
• Light
• Few joints necessary.
• Long lengths laid in short times.
• Lay easily around sharp bends.
• Easily joined to galvanized pipes.
• Cuts and joins with ease.
• Relatively cheap.
• Very resistant to rust and corrosion.
100 Agricultural Technology Grade 11
10.3. Disadvantages of PVC pipes.
• Destroyed by veldt fires.
• Easily damaged by digging.
• Blockages caused by roots entering leaks.
• Plant roots growing near the pipe may flatten the pipe.
• May be flattened by vehicles.
• Not biodegradable
10.4. Method of laying the pipe underneath the soil.
• Burry deep enough so that implements cannot damage it.
• Burry in sand.
• Joints must be watertight.
10.5 Why PVC Pipe?
- There are many reasons, ranging from:
• The flexibility and durability of the pipe to the skill and dedication of the people who make it.
• Polyvinyl chloride, better known as PVC or vinyl,
10.6 What are PVC Pipe Fittings?
• Polyvinyl chloride (PVC) pipe fittings typically are used to connect two sections or pieces of PVC pipe
together.
• This connection creates a union of the two pieces, or offers an end piece for other items to be connected.
• The most commonly used sizes are about 1.3 cm to 10 cm wide.
10.7 There are many types of fittings that each accomplishes a flow direction.
• The reducer is larger around on one end and smaller on the other to reduce water flow effectively from
larger PVC pipes to a smaller size. Reducers help increase water pressure as the coupler steps down the
flow.
• A coupler or union type of PVC pipe fitting is like a sleeve that slides over the end of each PVC pipe at a
joint and is used to join the two pieces of pipe together.
• Three-way, four-way, five-way, and six-way PVC pipe fittings are designed as a solid entry method with
as many separate exit points as each name implies.
• Elbow joints are plumbing fittings that are used to change the direction of the water’s flow to either a 45°
or 90° angle.
• Tee joint is another type of plumbing fitting, used primarily to combine or divide a flow of water.
• Cross joints are also plumbing fittings. They have three inlet valves and one outlet valve or vice versa, and
are commonly used for sprinkler systems.
• Cap PVC pipe fittings usually are used to cap off the flow of water at one point. Caps fit over the ends of
a pipe.
• Plugs fit into the end of a pipe.
Agricultural Technology Grade 11 101
11. COPPER PIPES
11.1. Uses of copper pipes.
• Water supplies in and around the house.
• Gas, oil or fuels are to be transported under low pressure.
• Used in confined spaces.
11.2. Advantages of copper pipes.
• Does not rust.
• Can withstand high temperatures.
• Can expand and contract without cracking.
11.3. Disadvantages of copper pipes.
• Expensive.
• Might not be readily available.
• Where they are installed where they are visible they must be painted.
12. Aluminium pipes
12.1. Name one use of aluminium pipes.
• Spray irrigation
12.2. Advantages of aluminium pipes.
• Very light.
• Handle easily.
• Coupling is simple.
• Do not corrode or rust easily.
• Can withstand high pressure.
12.3. Disadvantages of aluminium pipes.
• Easily damaged by vehicles.
• Do not weld easily.
• Relatively expensive.
• Cannot cut thread.
• Cannot be joined easily to other pipes.
13. GENERAL QUESTIONS
13.1 Give a short description and use of the following:
a) Plug.
• Used to close the end of a pipe.
102 Agricultural Technology Grade 11
b) Nipple.
• Short piece of piping with outside thread at both ends.Used where different systems /pipes are joined in a limited
space.
c) Another name for inside thread.
• Female thread
d) Socket.
• Short piece of piping with threads on the inside, used to join two pipes of the same thickness
e) Reducing socket.
• Used when pipes of different diameters are to be joined.
f) Hemp, Thread tape.
• Used for a sealing agent when joining two pipes by screwing them together.
g) Another name for outside thread.
• Male thread.
13.2. Give the correct solution for each of the following scenarios. Justify your answer with a reason in each case.
a) This pump is used to pump water from rivers or dams and is not a submersible pump. Centrifugal
pump. Are used in shallow water reservoirs.
b) This device can be used to switch a pump on or off over a great distance.
Cell phone/Two way radio. Use a transmitter and a receiver to do the switching.
c) The metal from which quick coupling spray irrigation pipes are manufactured. Aluminium. Lightness.
d) The type of metal that can be used to manufacture sprayers for irrigation purposes. Brass, PVC,
Corrosion resistant
e) A qualified person needs to connect electrical wiring to Eskom’s distribution network. Electrician. Very
dangerous job. Person without knowledge can be killed by the high current.
14. SOURCES OF IRRIGATION WATER
• Sources of irrigation water can be groundwater extracted from springs or by using wells, surface water withdrawn
from rivers, lakes or reservoirs or non-conventional sources like treated wastewater, desalinated water or drainage
water.
15. WATER SOURCE PIPING
• The beginning of a sprinkler system is the water source.
• This is usually a tap into an existing (city) water line or a pump that pulls water out of a well or a pond.
• The water travels through pipes from the water source through the valves to the sprinklers. The pipes from the
water source up to the irrigation valves are called “mainlines”, and the lines from the valves to the sprinklers are
called “lateral lines”.
• Most piping used in irrigation systems today are HDPE and MDPE or PVC or PEX plastic pressure pipes due to
their ease of installation and resistance to corrosion.
• After the water source, the water usually travels through a check valve.
Agricultural Technology Grade 11 103
• This prevents water in the irrigation lines from being pulled back into and contaminating the clean water supply.
16. WHAT ARE THE DIFFERENT AGRIBUSINESS JOBS?
• While many people think of work in the agricultural business as being focused mainly on farming, the truth is there
are many different types of jobs associated with agribusiness.
• Many of these positions require intensive training as well as formal education at accredited institutions.
17. Here are some examples of agribusiness jobs that may be of interest.
At the core of the roster of agribusiness jobs are those that are directly associated with agricultural production.
• This is the most familiar category to many people, since it includes both family and commercial farmers, those
who actively plant, nurture, and reap crops.
• Along with farmers, consultants like county agents help to determine what is planted where, how crops are
rotated, and how the soil is replenished for future growing efforts.
• Agribusiness jobs also include career options that have to do with education related to the business side of
agriculture.
• This includes instructors who help commercial farmers learn how to manage a larger farm operation to best effect,
both in terms of cultivation and harvesting of crops, but also in matters such as establishing a corporate structure,
setting goals, and the general processes necessary to successfully operate an agricultural business.
• From this perspective, corporate consultants, accountants, and others who specialize in agriculture are among
the most valuable of all agribusiness jobs.
• Marketing and sales initiatives are also key examples of agribusiness jobs.
• Agribusiness companies looking for raw product to purchase must promote themselves to those who actually
grow the crops.
• At the same time, growers must also attract the attention of large business that will want to buy what they grow.
• Networking experts are also among the more important agribusiness jobs today.
18. WHAT ARE THE DIFFERENT TYPES OF AGRICULTURE JOBS THAT REQUIRES SPECIALIZED TRAINING?
There are several other agriculture jobs which require specialized training and a university degree. Product developers,
Researchers, Agricultural scientists, Businesses, Agricultural product cultivation, processing and sale, Agricultural
economists, Biological scientist, Crop consultants, Forestry, Firefighters.
104 Agricultural Technology Grade 11
Notes
Agricultural Technology Grade 11 105
Notes
106 Agricultural Technology Grade 11
Published by the Department of Basic Education
222 Struben Street
Private Bag X895, Pretoria, 0001
Telephone: 012 357 3000 Fax: 012 323 0601
© Department of Basic Education
website facebook twitter
www.education.gov.za www.facebook.com/BasicEd www.twitter.com/dbe_sa
Study this subject
Notes, quizzes and topic questions for Grade 11 Agricultural Technology.
Recommended for this subject
More papers and memos for this grade and subject.